2.0 Version: Render #
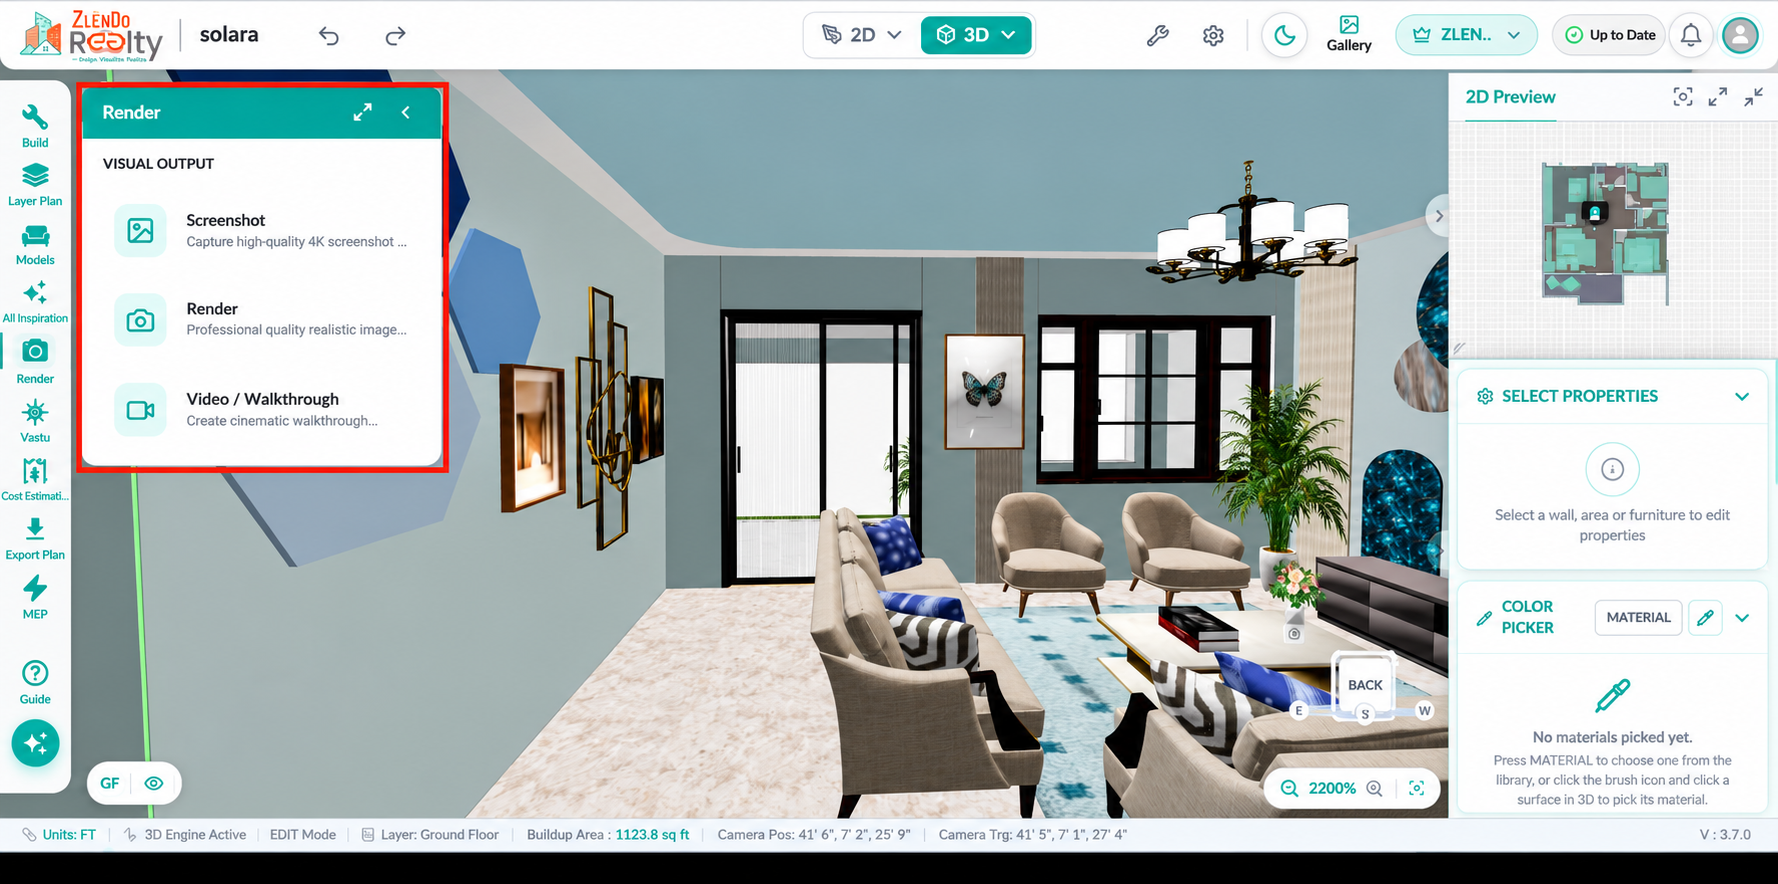
The Render feature enables users to create and export high-quality visual outputs from the project.
Depending on the presentation requirement, users can capture a quick screenshot, generate photorealistic rendered images, or create cinematic walkthrough videos.
Each option opens dedicated tools and settings to customize the output quality, camera view, and presentation style before exporting the final result.
1. Screenshot #
The Screenshot option captures the current view exactly as displayed in the editor. It provides a quick way to save and share the project without entering any additional rendering workflow.
Use Cases #
- Quick design reviews
- Progress documentation
- Sharing current project views
- Presentation references
2. Render Image #
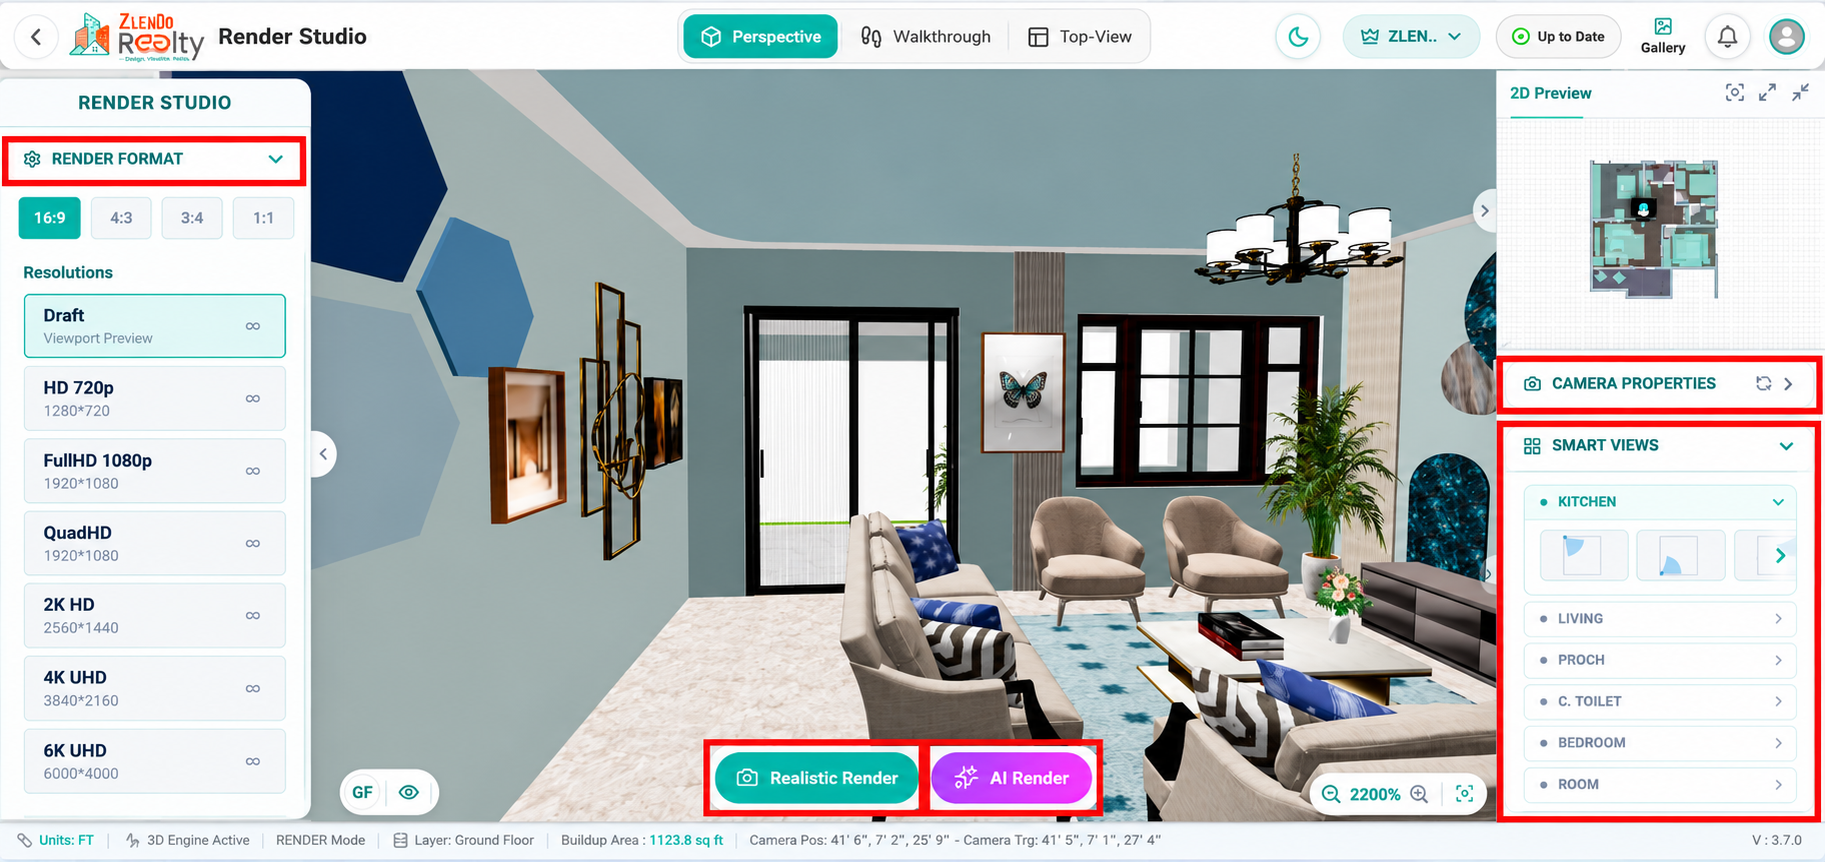
The Render Studio allows users to create high-quality photorealistic images of the project. Users can choose image dimensions, camera angles, and room-specific viewpoints before generating the final render.
Features Available #
Render Format
- 16:9
- 4:3
- 3:4
- 1:1
Resolution Options
- Draft Preview
- HD 720p
- Full HD 1080p
- Quad HD
- 2K HD
- 4K UHD
Camera Properties
- Adjust camera position and viewing angle.
- Fine-tune the scene composition before rendering.
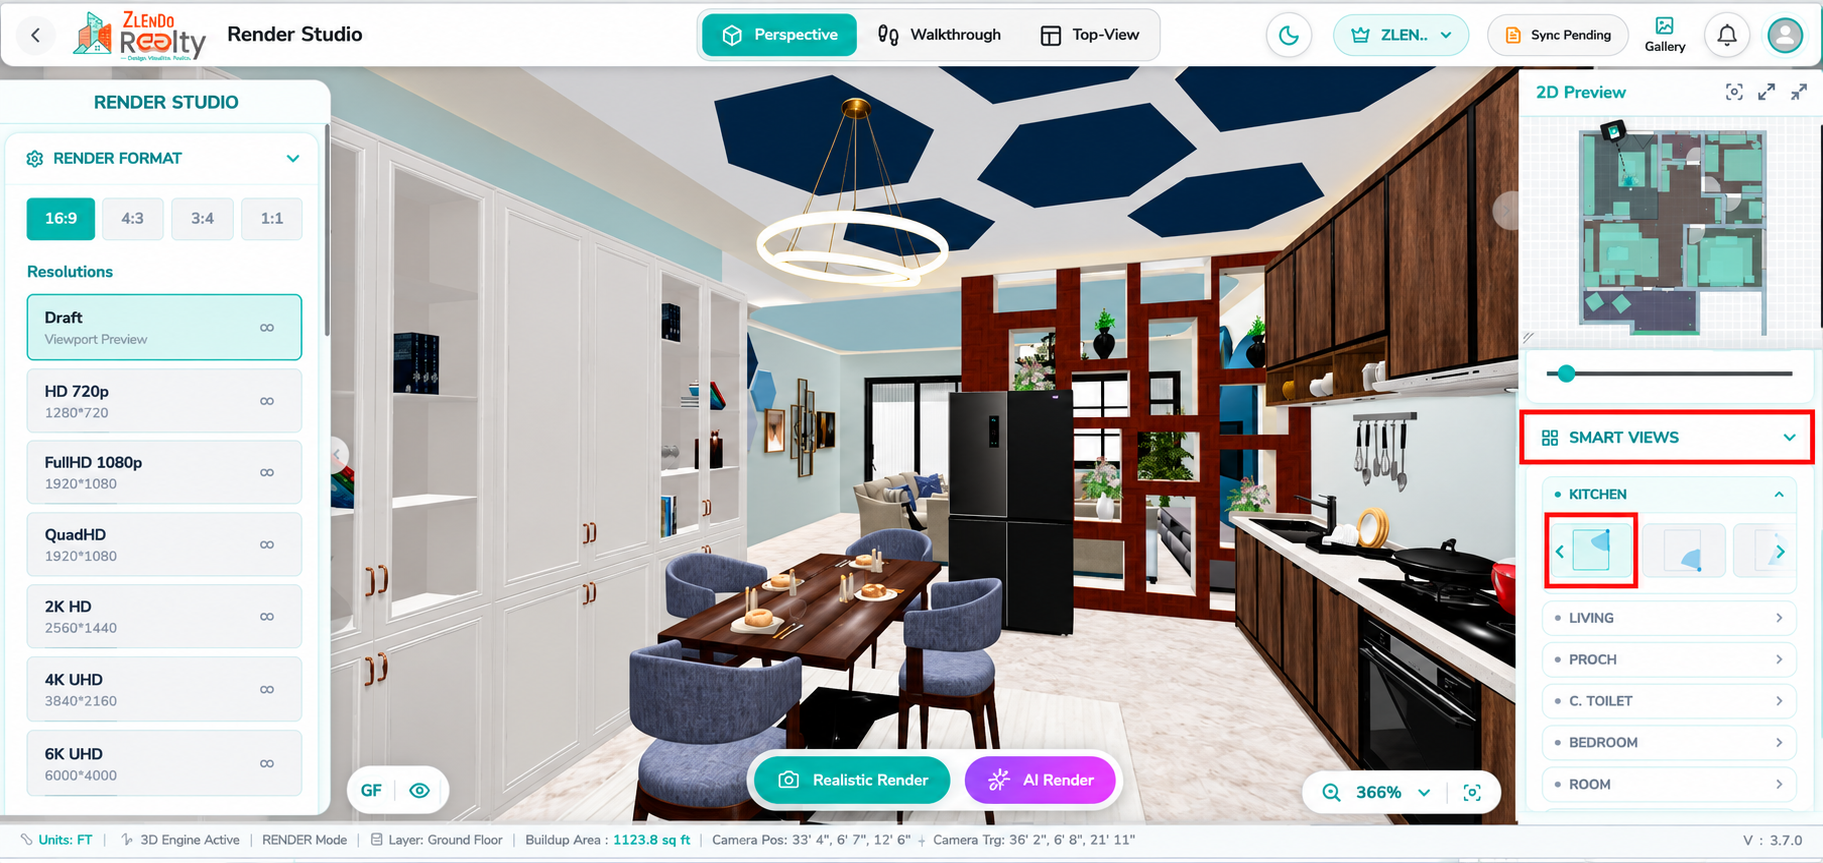
Smart Views #
The Smart Views feature provides automatically generated camera viewpoints for each room in the project. These predefined views help users quickly navigate to ideal rendering angles without manually adjusting the camera position.
Features Available
Displays room-wise view categories such as:
- Kitchen
- Living Room
- Porch
- Common Toilet
- Bedroom
- Other project spaces
- Multiple predefined viewpoints are available for each room.
- Select a thumbnail to instantly switch to the corresponding camera angle.
- Helps create consistent and presentation-ready render outputs.
- Reduces the time required to manually position cameras for rendering.
Render Options #
- Realistic Render – Creates a photorealistic image using rendering settings.
- AI Render – Generates enhanced rendered visuals using AI-assisted rendering techniques.
3. Render Video / Walkthrough #
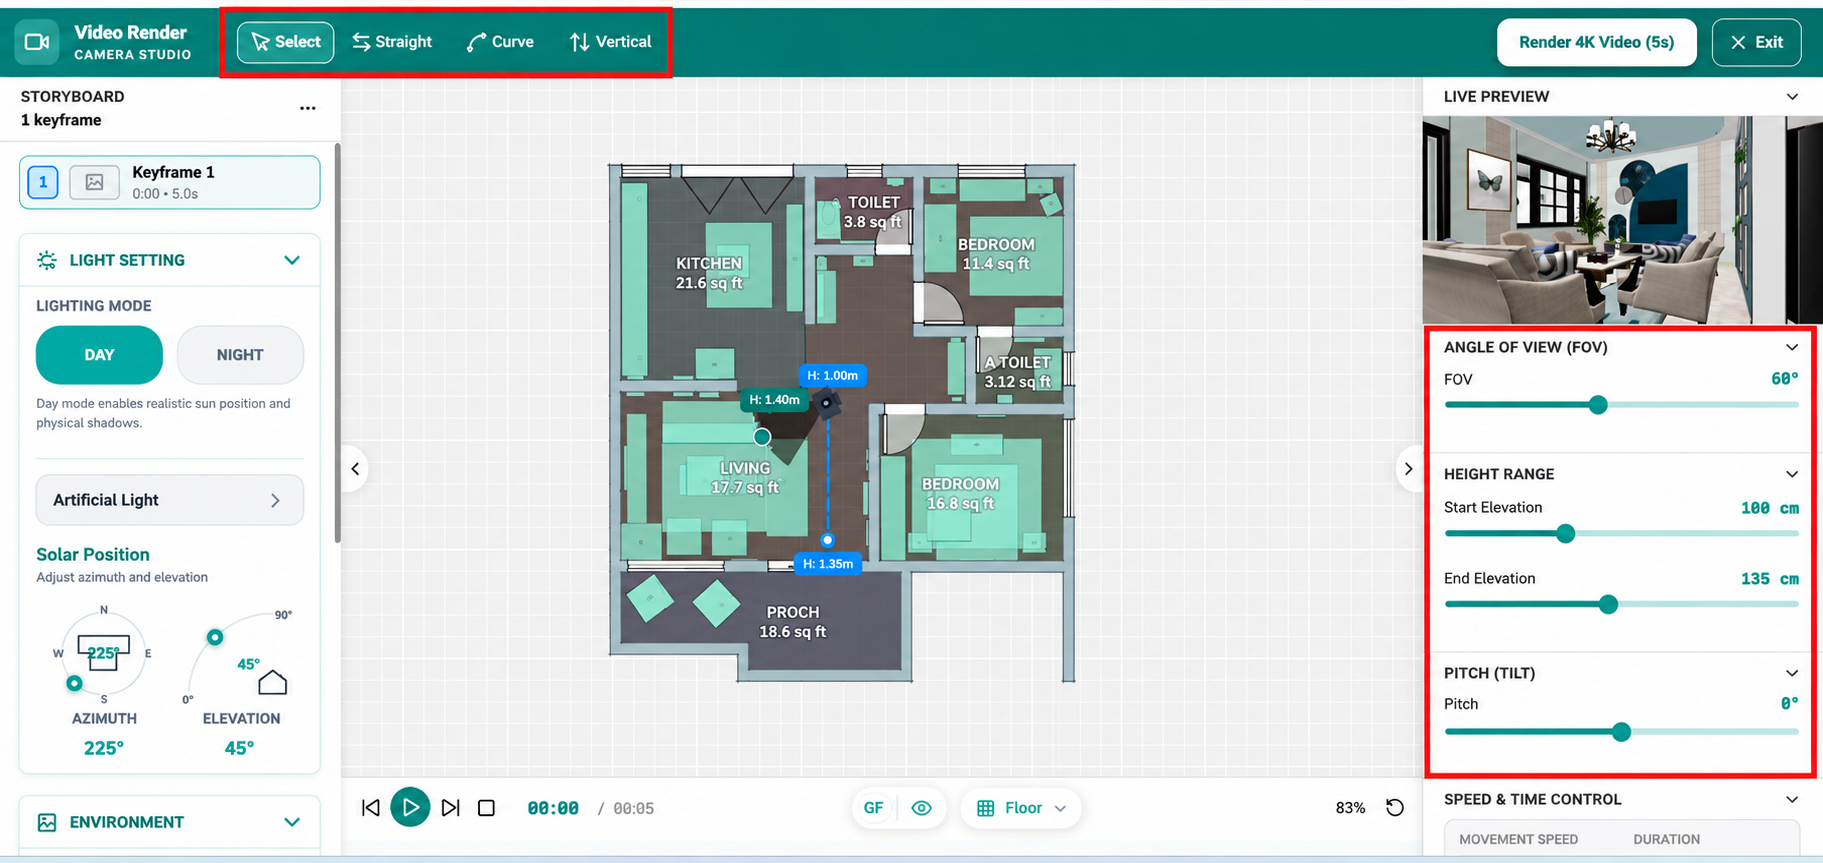
The Video Render Studio is used to create animated walkthrough videos of the project. Users can define camera movement paths and customize viewing parameters before generating the final video.
Features Available #
Path Creation Tools
- Straight Path
- Curved Path
- Vertical Path
Live Preview
- Displays the real-time camera view of the walkthrough.
Camera Controls
- Field of View (FOV)
- Start Elevation
- End Elevation
- Pitch (Tilt)
Storyboard Timeline
- Manage keyframes and camera movements.
- Create smooth walkthrough sequences.
Video Rendering
- Generate the final walkthrough video after path setup.
Note #
- Use Screenshot for quick image captures.
- Use Render Image for high-quality photorealistic visuals.
- Use Render Video / Walkthrough for animated project tours and presentations.


