2.0 Version: AI Inspiration #
AI Inspiration for Room, Exterior, and Elevation #
The AI Inspiration feature helps generate design ideas for Interiors, Exteriors, and Elevations using professionally curated styles. Users can quickly visualize different design concepts and apply them to selected areas of a project.
Additionally, customized room designs can be saved and reused in future projects through the Save as Room Inspiration option.
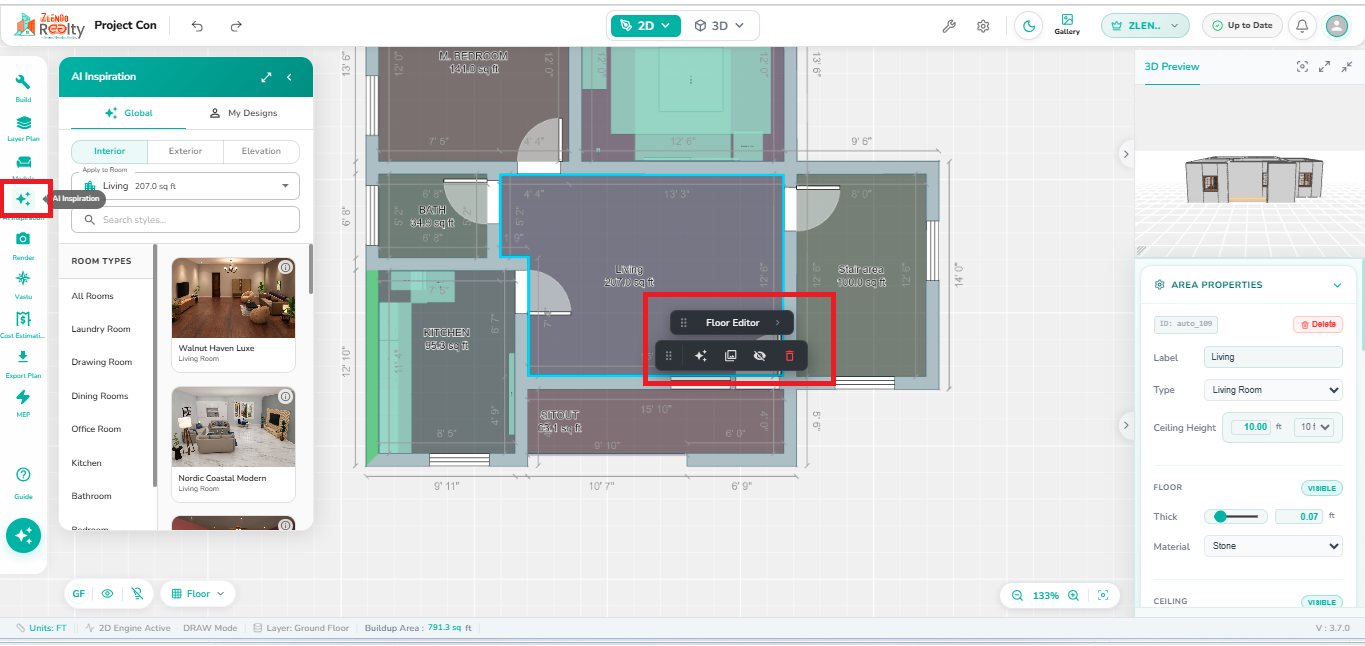
1. Interior AI Inspiration #
The Interior AI Inspiration feature helps furnish and design a room within minutes using AI-generated interior concepts.
Based on the selected room type and area, the system displays suitable inspiration styles that can be previewed, customized, and applied to the room.
Applying an Interior AI Inspiration #
- Select a room from the floor plan, for example, Living Room.
- Open AI Inspiration from the left toolbar.
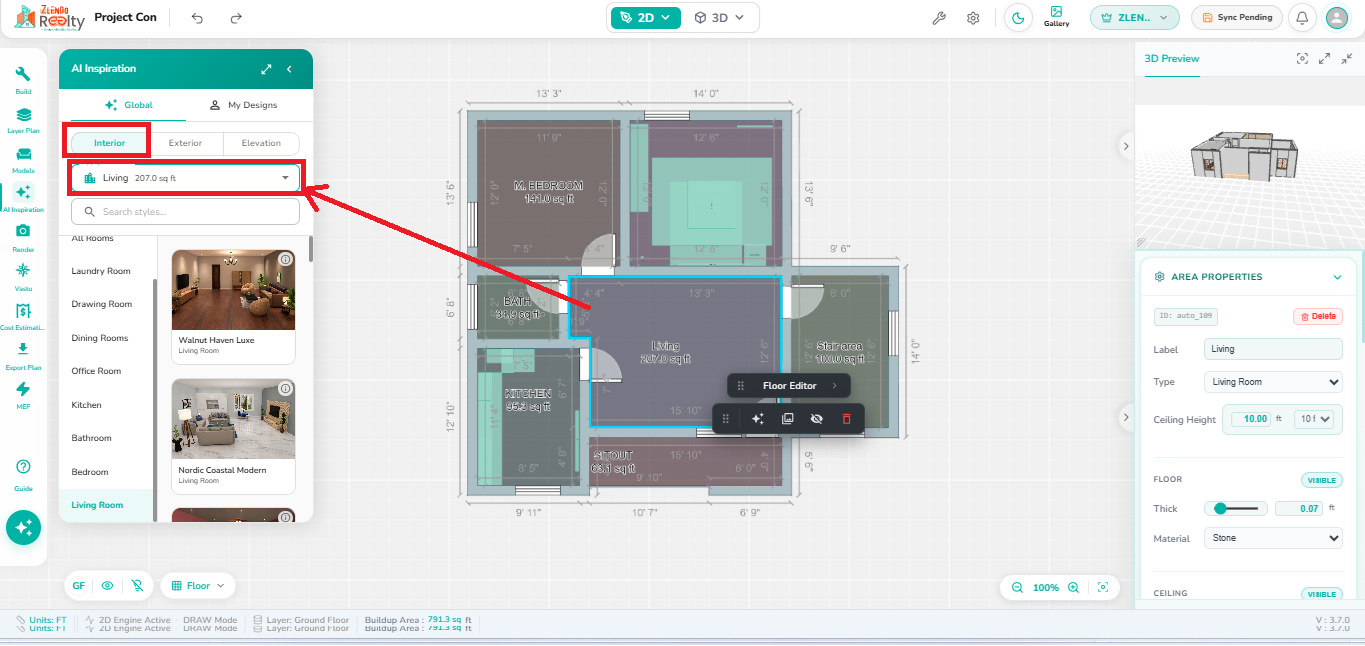
- Select the Interior tab.
- Verify the selected room and room area in the Apply to Room field.
- Browse the available Living Room inspiration styles.
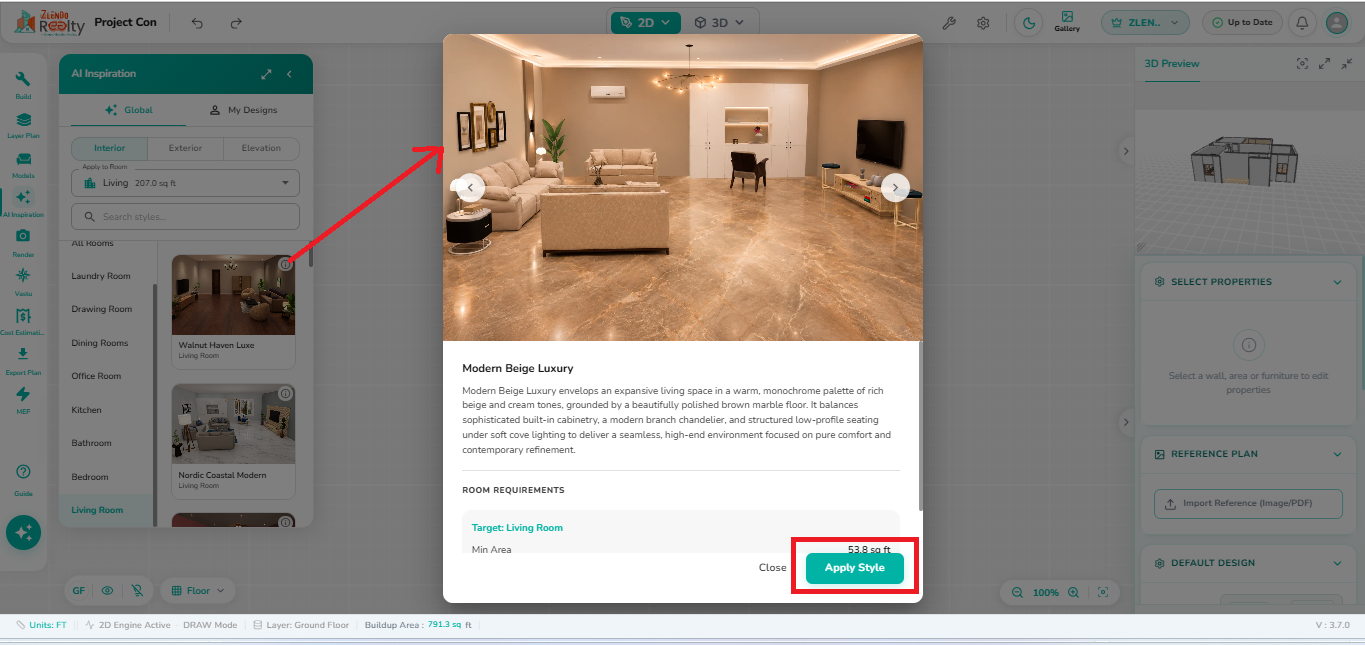
- Click the Information (i) icon to preview a style.
- Use the Previous and Next controls to explore additional inspirations.
- Select the preferred style and click Apply Style.
- In Customize Your Inspiration, choose which existing elements to keep or allow to change: doors and windows, floor finishes, wall finishes, and ceiling finishes.
- Click Apply Preferences. The AI generates and applies the selected interior design concept to the room.
Open Interior AI Inspiration #
After selecting a room in the floor plan, such as a Living Room, open the AI Inspiration panel and select the Interior tab.
The system automatically identifies the selected room type and its area. Suitable inspirations appear in the list so users can browse different styles and choose one that matches their design preference.
Preview Interior Inspiration Style #
Click the Information (i) icon on an inspiration card to open the detailed style preview. The window displays a larger view of the design concept, its description, and room requirements.
Use the Previous and Next arrows to browse available styles. Once a preferred style is selected, click Apply Style to continue to customization settings.
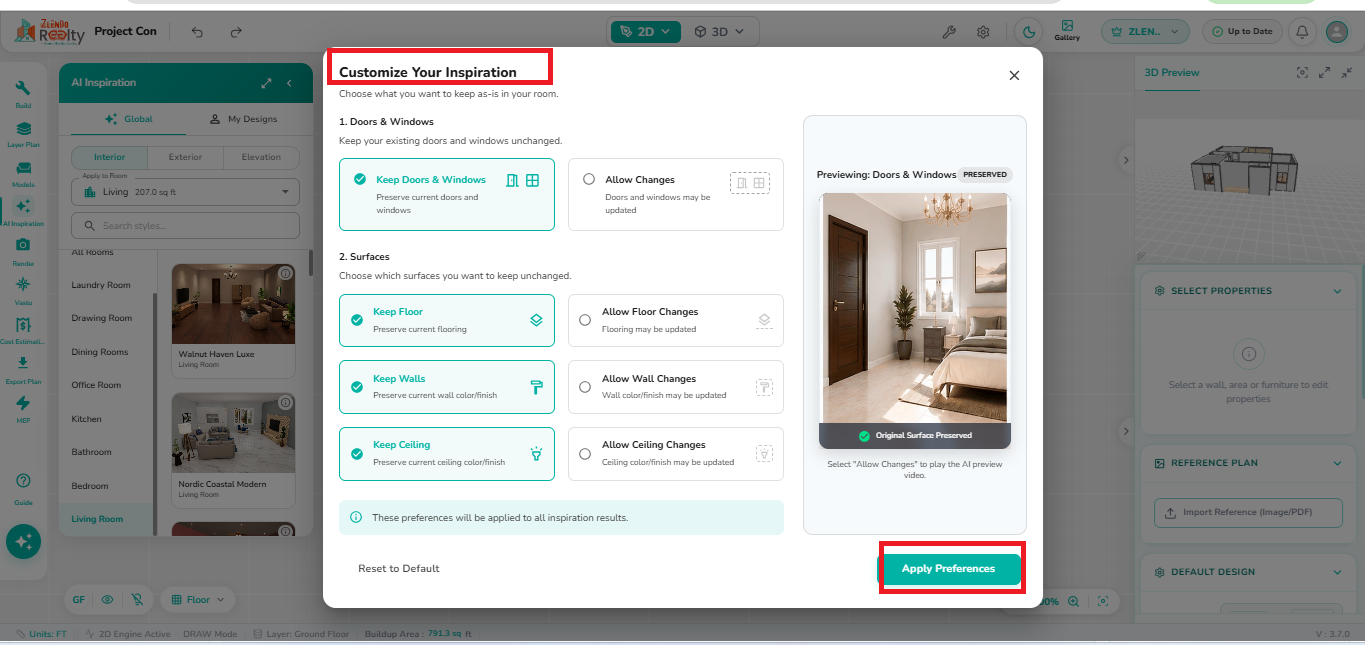
Customize Your Inspiration #
Before applying the inspiration, Customize Your Inspiration lets users define what should be preserved from the existing room. This provides control over how much of the current design is modified.
- Doors & Windows: Keep existing doors and windows or select Allow Changes.
- Floor: Keep current flooring or allow floor changes.
- Walls: Keep the current wall color or finish or allow wall changes.
- Ceiling: Keep the current ceiling color or finish or allow ceiling changes.
Click Apply Preferences to apply the selected settings. These preferences will be applied to all inspiration results.
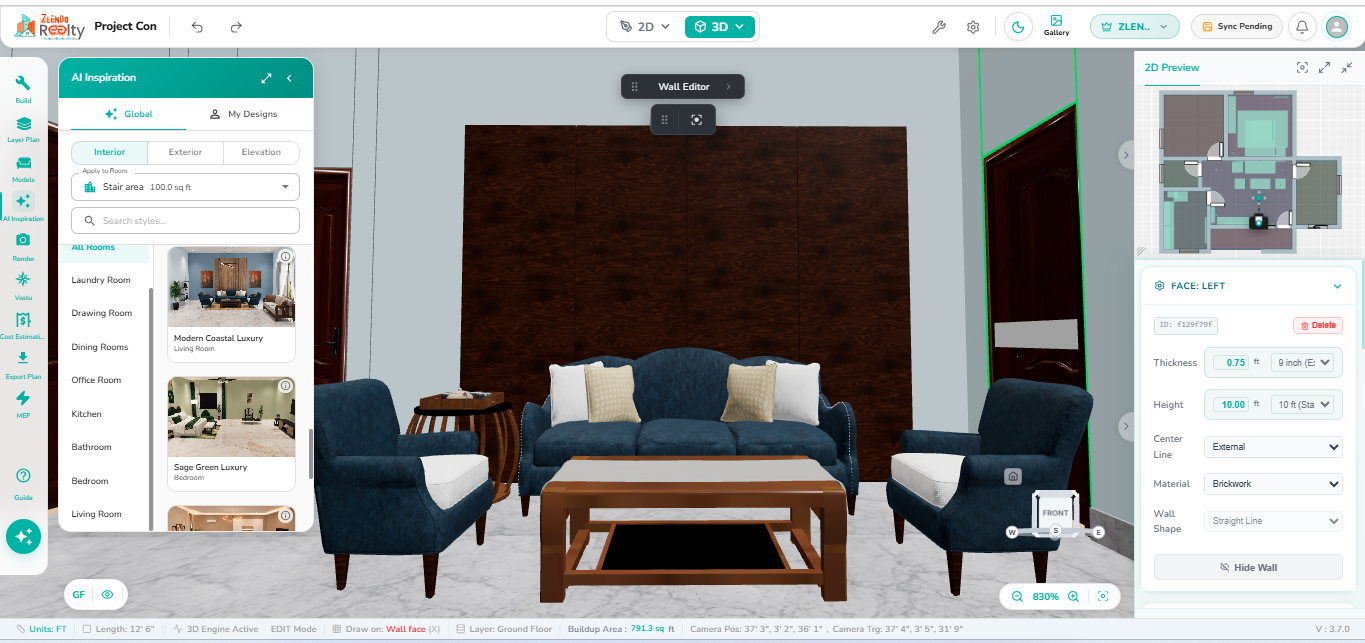
Applied Interior Inspiration #
The selected interior concept is applied to the room. Review the result in 3D view and continue editing the design as needed.
Note #
- Room-aware suggestions: Inspirations are automatically filtered by the selected room type and area.
- Preview first: Interior styles can be previewed before application.
- Preserve existing elements: Architectural elements can be retained while applying furniture and décor inspirations.
- Continue editing: Applied designs can be further edited after generation.
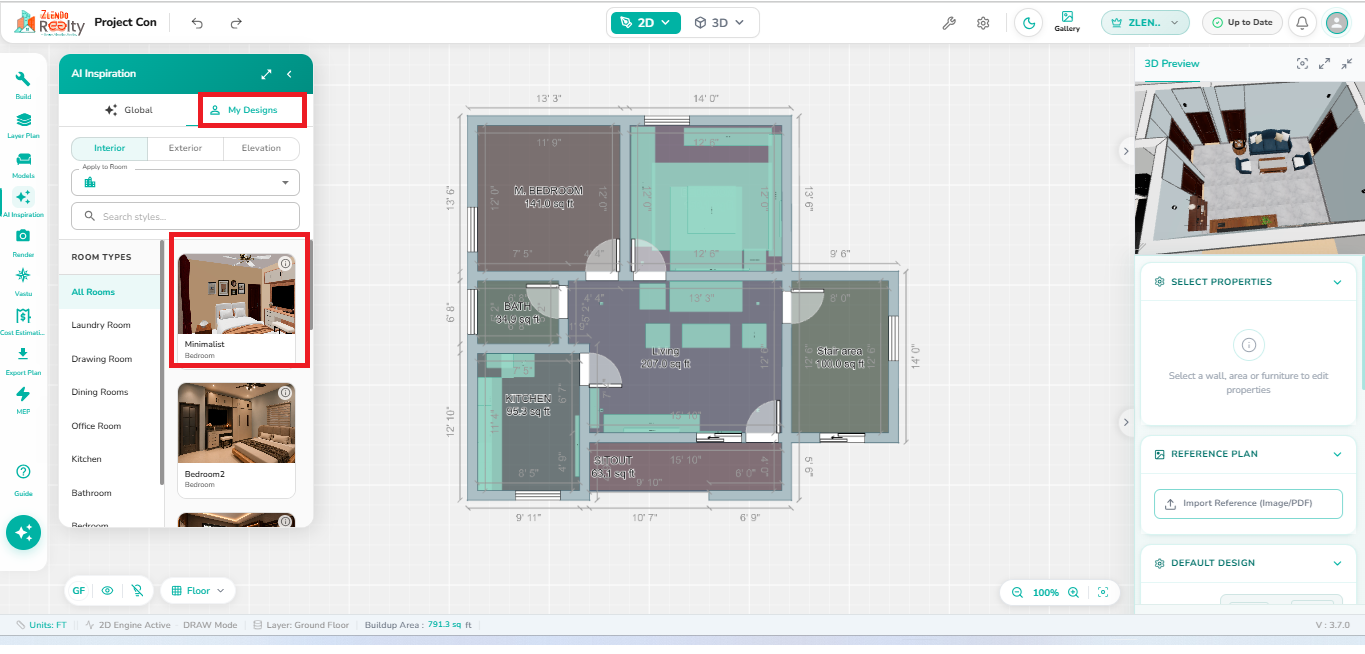
- Save for reuse: Customized rooms can be saved under My Designs as Room Inspirations.
2. AI Inspiration Save Option #
After customizing an AI-generated room design, users can save the completed design as a Room Inspiration Template. Saved inspirations become available in My Designs and can be reused in future projects.
Steps to Save an Inspiration #
- Customize a room design.
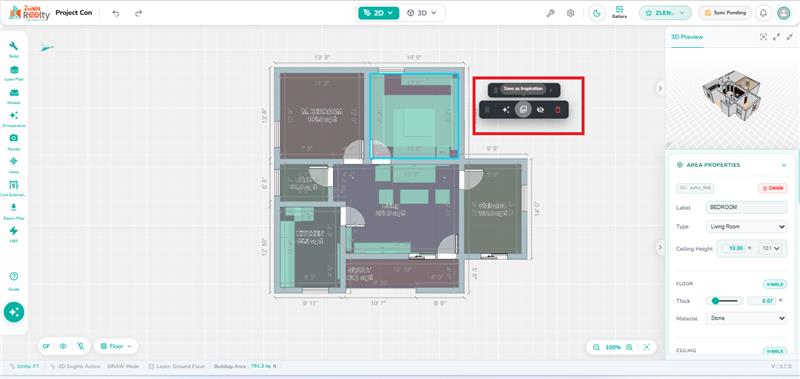
- Click Save as Inspiration.
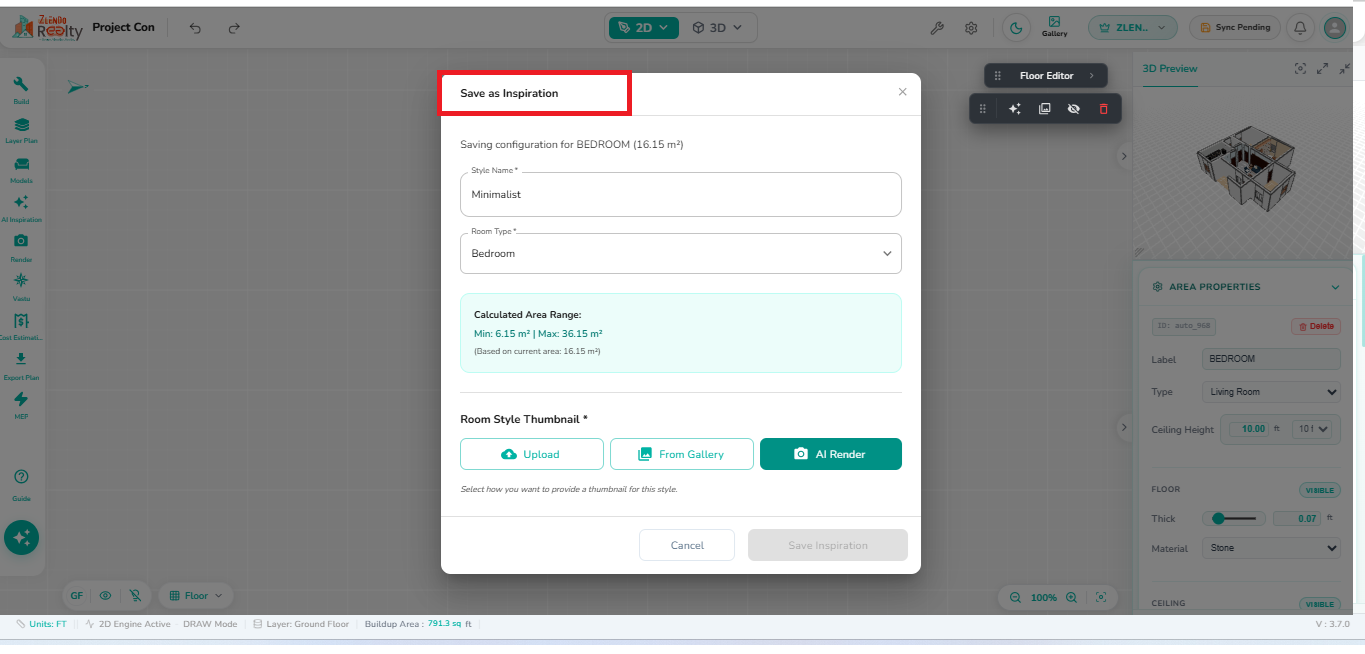
- Enter a unique Style Name.
- Verify or select the appropriate Room Type.
- Review the calculated area range.
- Add a thumbnail using Upload, From Gallery, or AI Render.
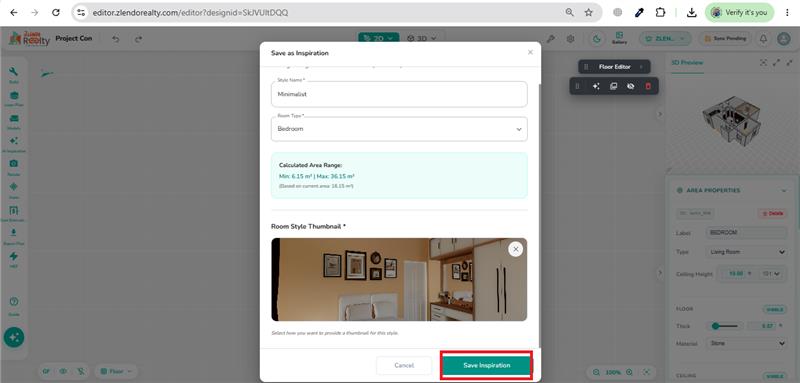
- Review the selected thumbnail preview.
- Click Save Inspiration. The inspiration is stored under My Designs for reuse in future projects.
Open Save as Inspiration #
Enter Inspiration Details and Choose a Thumbnail #
Enter a unique Style Name, verify the Room Type, and review the supported area range.
- Upload: Add an image from your device.
- From Gallery: Select an existing gallery image.
- AI Render: Generate a thumbnail using AI Render.
Review and Save the Inspiration #
After selecting a thumbnail, review its preview and click Save Inspiration to store the customized room design in My Designs.
The dialog records the room configuration, area information, and thumbnail as a reusable design template that can be applied across projects.
Saved Inspirations in My Designs #
After saving, the custom room design is added to the My Designs library. Saved inspirations display a thumbnail preview, style name, and room type so users can quickly find and apply previously created designs.
3. Reusing Saved Room Inspirations #
Saved Room Inspirations can be applied to rooms in new or existing projects. Designers can reuse successful interior concepts, standard room layouts, and customized styles without rebuilding the design from scratch.
Steps #
- Open a new or existing project.
- Select the room and launch AI Inspiration.
- Navigate to My Designs.
- Select a previously saved Room Inspiration.
- Apply the inspiration to the selected room.
4. AI Elevation Inspiration #
The AI Elevation Inspiration feature helps users quickly enhance the building façade by applying AI-generated elevation design concepts.
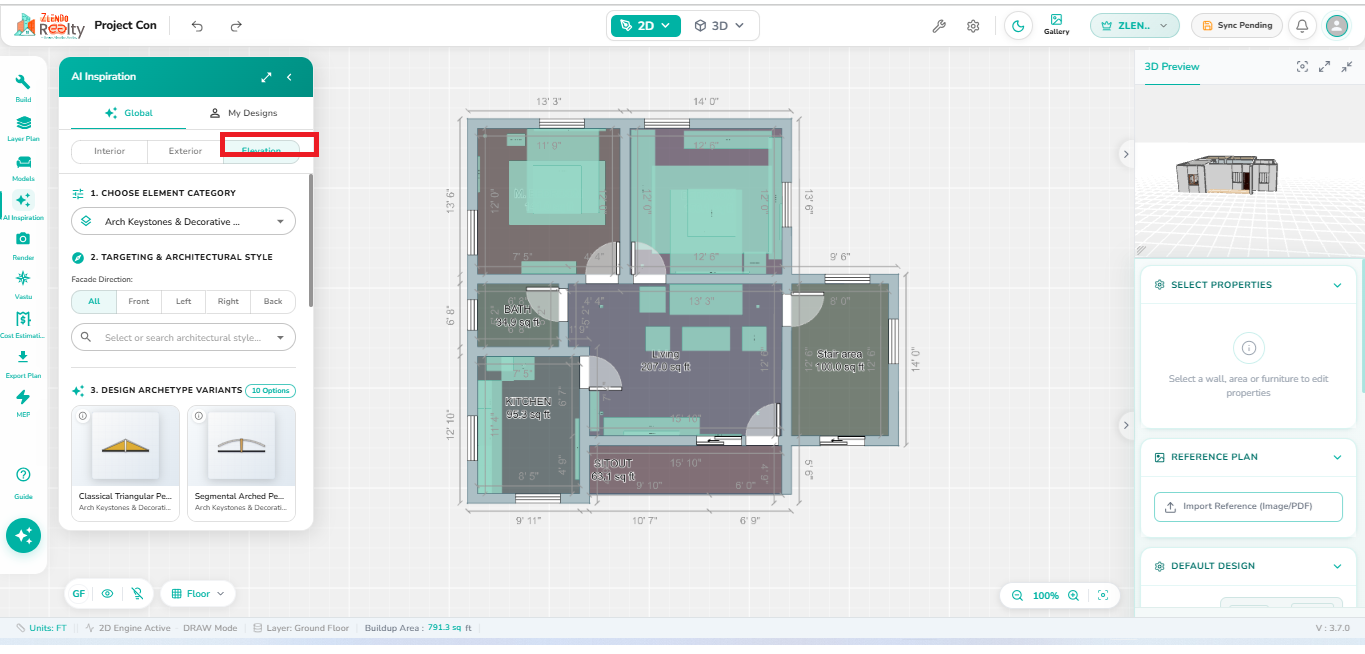
From the Elevation tab, users can select specific architectural elements, choose which side of the building elevation to modify, and browse different elevation design variants.
Features Available #
The panel provides controls to:
- Select an Element Category for elevation enhancement.
- Target a specific Façade Direction, such as Front, Left, Right, or Back elevation.
- Filter designs based on Architectural Style.
- Browse multiple Design Archetype Variants generated by AI.
- Preview and apply elevation concepts to improve the building’s external appearance.
AI Elevation Inspiration assists in creating attractive façade designs by suggesting architectural features, decorative elements, patterns, profiles, trims, and stylistic enhancements suitable for the selected elevation face.
Steps to Apply Balcony Railing Inspiration #
- Open AI Inspiration from the left toolbar.
- Select the Elevation tab.
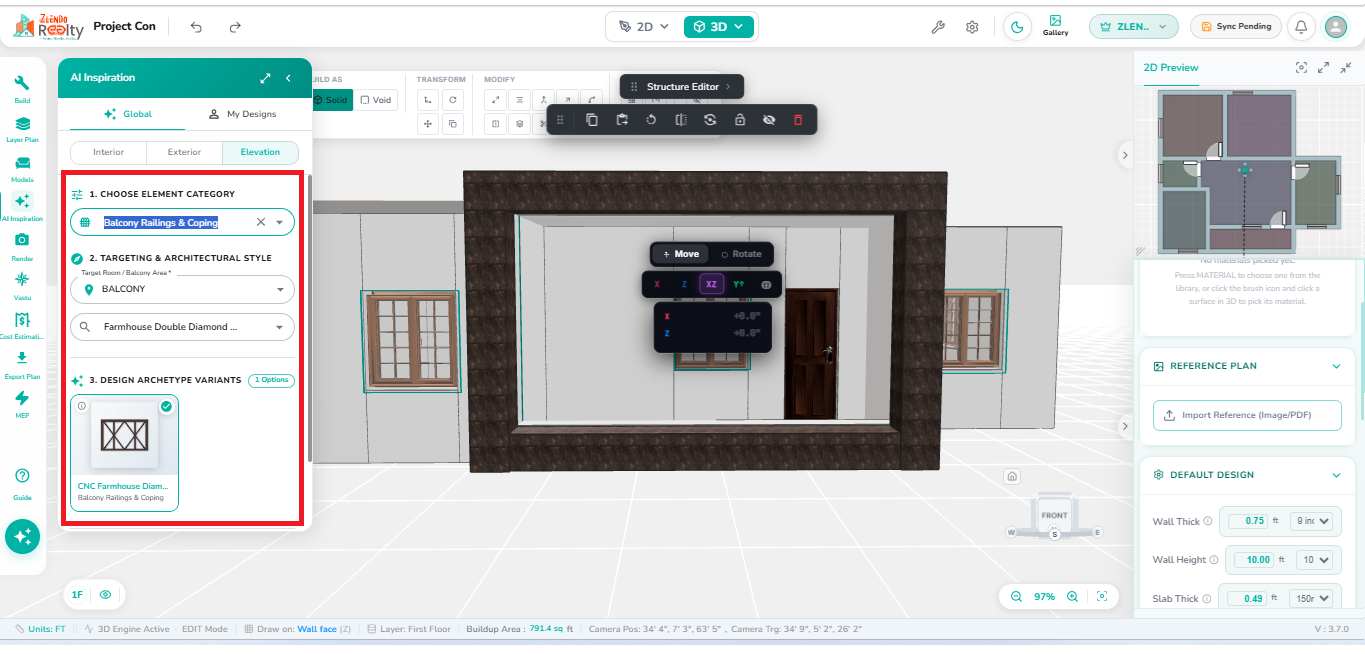
- Under Choose Element Category, select Balcony Railings & Coping.
- Under Targeting & Architectural Style, choose the desired balcony area.
- Select an architectural style from the style dropdown.
- Browse the available Design Archetype Variants.
- Click the preferred balcony railing design variant.
- Review the selected railing design.
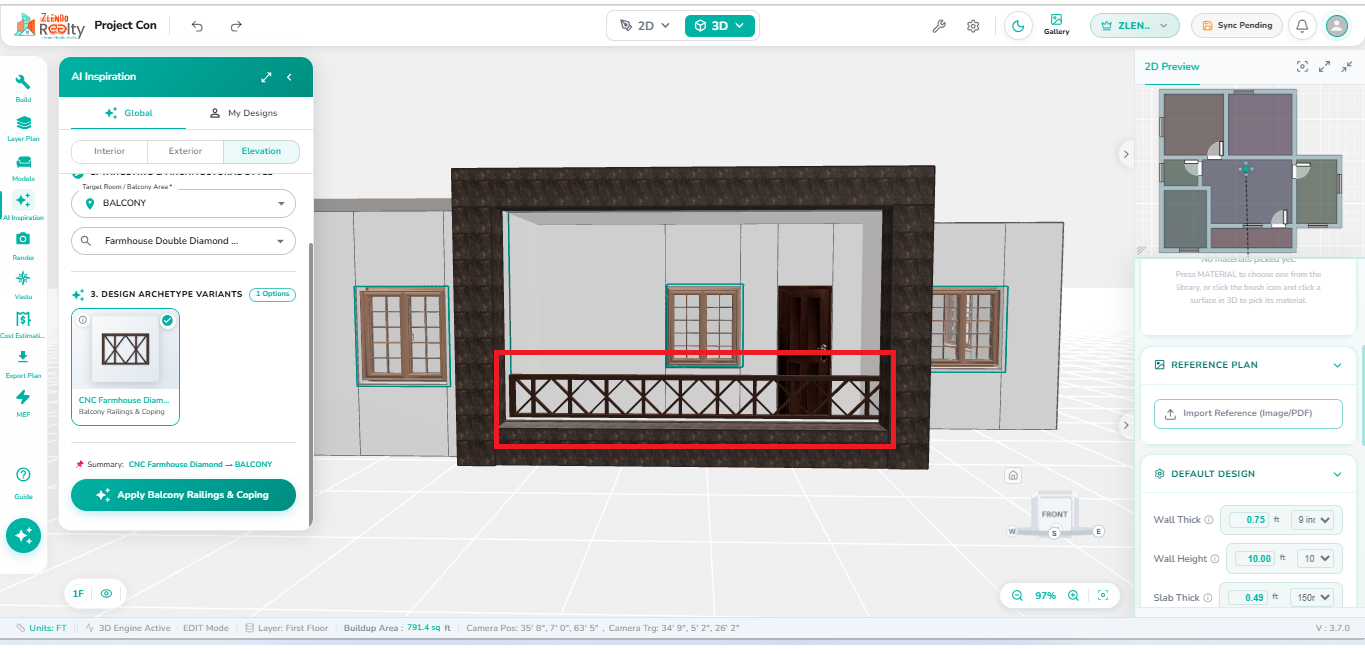
- Click Apply Balcony Railings & Coping to generate and place the balcony railing on the elevation.
- The balcony elevation is updated with the selected AI-inspired railing design.
Applying the Selected Railing Design #
The AI Elevation Inspiration feature allows users to quickly enhance balcony areas with decorative railing designs. In this example, Balcony Railings & Coping is selected as the elevation element category. The user chooses the target balcony area, selects an architectural style, and picks a railing design variant from the available AI-generated options.
Once the preferred design is selected, the AI applies the railing style to the balcony elevation, instantly improving the exterior appearance while maintaining the overall architectural theme of the building.
Result #
- Railing style applied: The selected balcony railing style is added to the elevation.
- Automatic fit: Railing dimensions automatically fit the targeted balcony area.
- Real-time update: The building façade is updated in real time.
- Further customization: Applied railing designs can be further customized or replaced using Elevation tools.


