The 2.0 version of Zlendo Realty Workspace comes with new features and a more efficient interface.
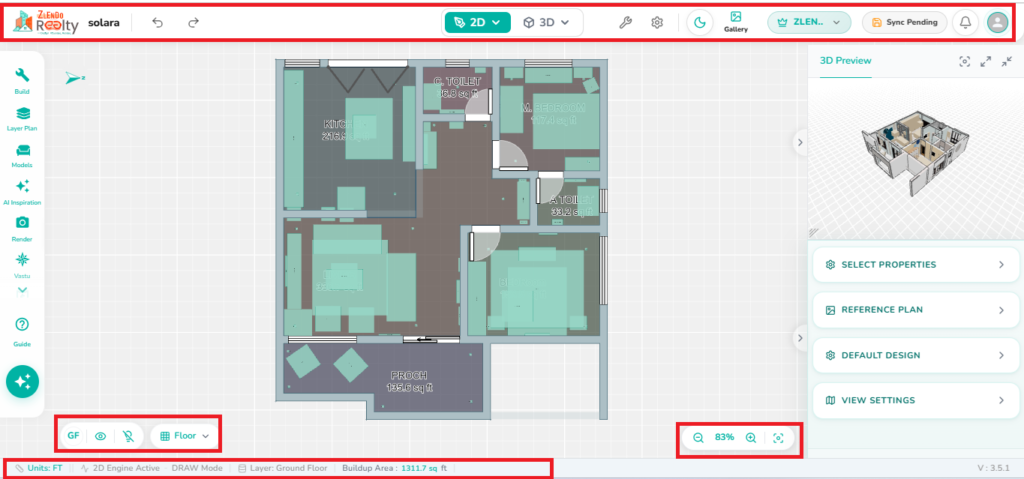
The Zlendo 2.0 Workspace updates are set up to keep everything you need within reach while keeping your drawing area as clean as possible.
2.0 Editor Top Ribbon #
The workspace top Ribbon has the tools to help you control the “big picture” settings for your project.

The updated workspace top ribbon displays the following information & control buttons:
The current file name/Project Name
Undo/Redo option
The View Mode Toggle buttons: 2D to 3D mode:
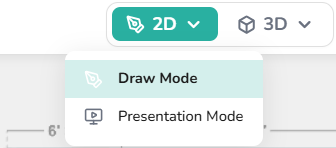
2D Mode
1. Draw Mode: Use this for structural work, like adding walls, windows, and doors. This mode helps you focus on the architectural accuracy of your floor plan.
2. Presentation Mode: This mode removes the grid lines and editing handles to show a clean, professional top-down view of your floor plan, which is perfect for client previews.
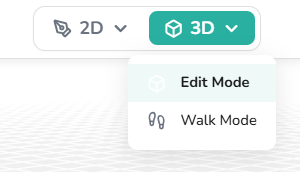
3D Mode
1. Edit Mode: Allows you to select, move, and rotate objects in a 3D environment while still having access to item settings.
2. Walkthrough Mode: This locks your editing capabilities and turns your camera into a “first-person” view. You can navigate the space as if you were walking through the finished home.
Drawing Measurement tools (Spanner Icon)
The Toolbar button (spanner icon) opens the Measurement, Grid lines and Dimension tools menu.
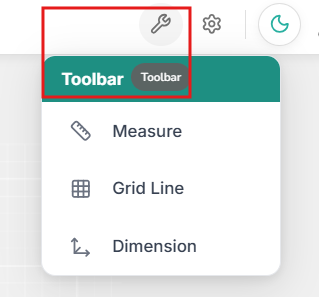
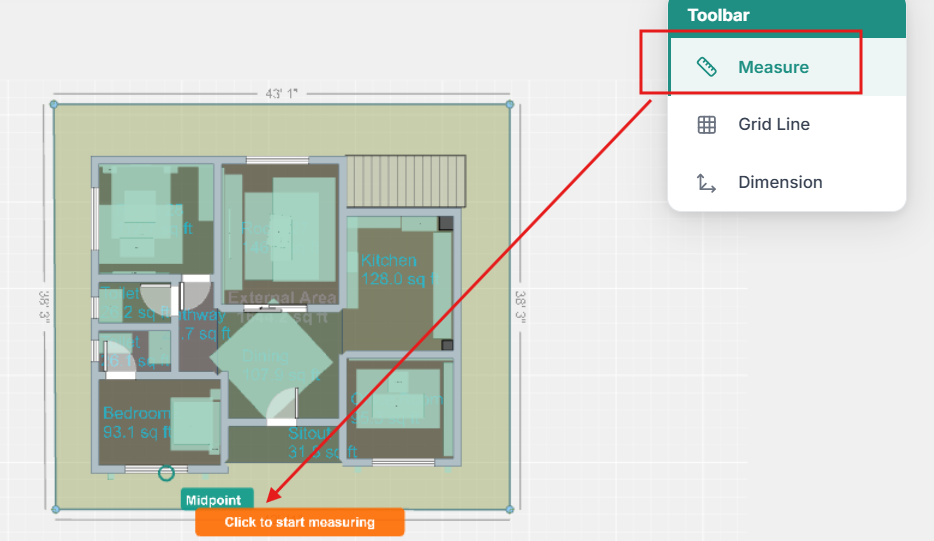
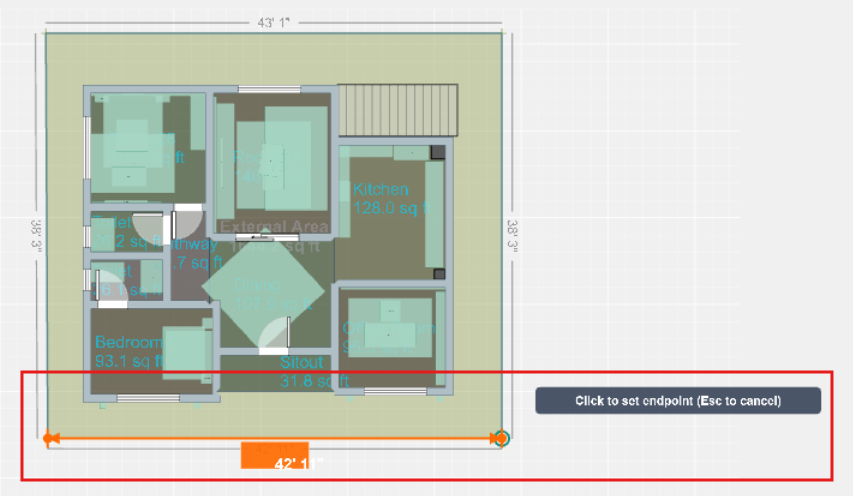
Measure Tool
When activated, this allows you to click between any two points in your 2D plan to get an accurate distance reading. This tool is critical for ensuring your construction project or furniture layout adheres to local building codes or interior design spacing requirements.
Grid Line Tool
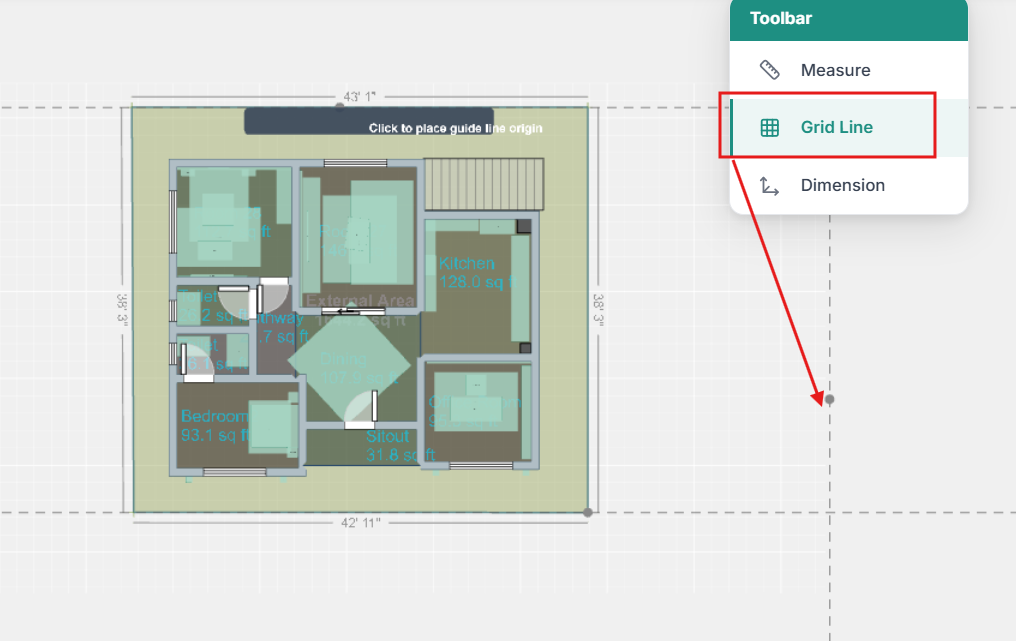
Provides a visual reference system (like graph lines) on your project drawing board.
Dimension Tool
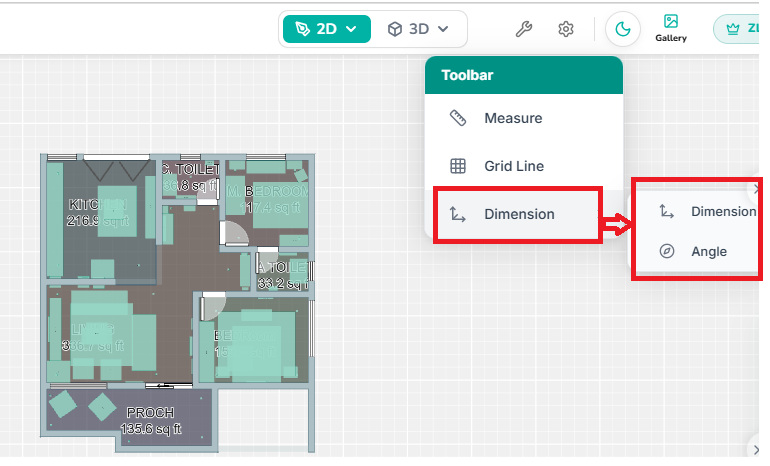
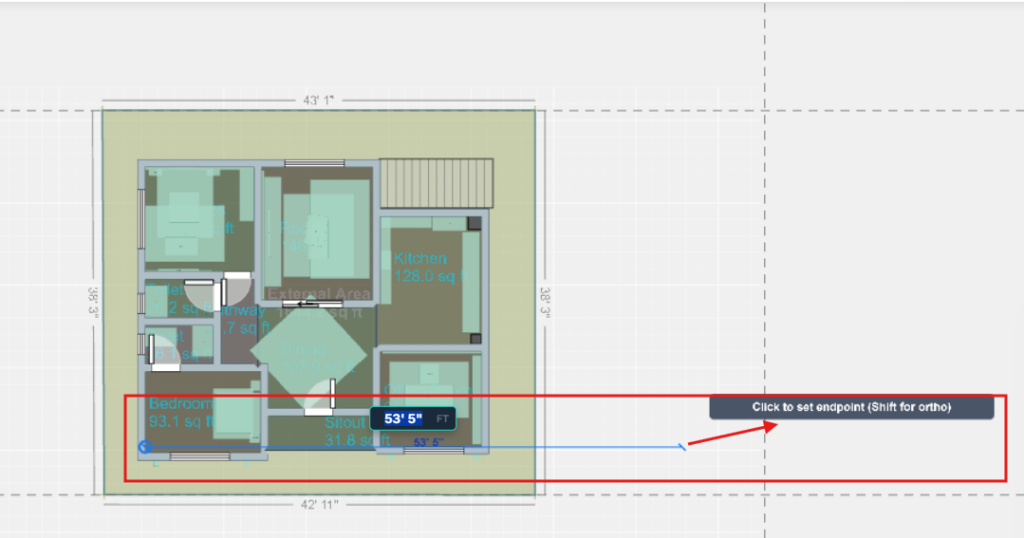
The Dimension option in the toolbar expands to display Dimension and Angle measurement tools for adding and viewing measurements on the 2D floor plan.
1. Dimension
this tool is used for documenting permanent architectural measurements on your plan. If you need to show the clearance between a counter and an island, or the exact width of a doorway, you use the dimension tool to click two points. The tool then anchors a “dimension string” to the drawing, which stays attached to those objects even if you move them.
2. Angle
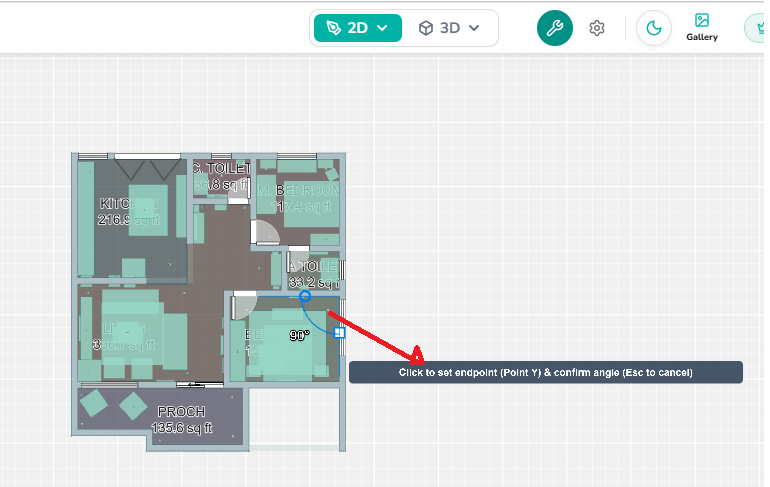
In the Architect Perspective view, the Angle measurement tool is active, displaying a angle marker between two selected points on the floor plan. A guidance message prompts the user to click and set the endpoint (Point Y) to complete and confirm the angle measurement.
Measure Tool vs Dimension Tool vs Angle Tool
| Feature | Measure Tool | Dimension Tool | Angle Tool |
|---|---|---|---|
| Duration | Temporary (disappears when you click away) | Permanent (stays on the drawing) | Permanent (stays on the drawing) |
| Primary Use | Quick “what-if” spacing checks | Creating formal, labeled blueprints | Measuring and annotating angles between lines or points |
| Interaction | Just a distance reading | Creates an annotated line segment | Creates an annotated angle measurement |
| Output | Reference measurement | Saved dimension annotation | Saved angle annotation |
| Measurement Type | Distance only | Linear distance | Angle (degrees) |
Editor/Workspace Settings
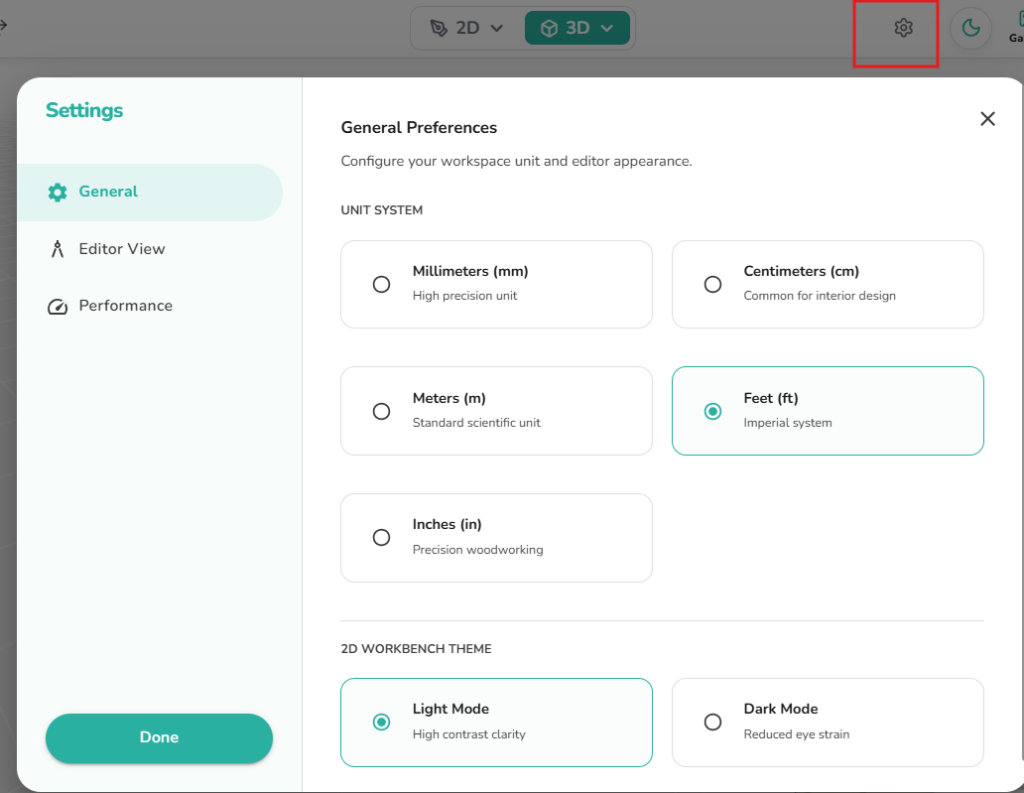
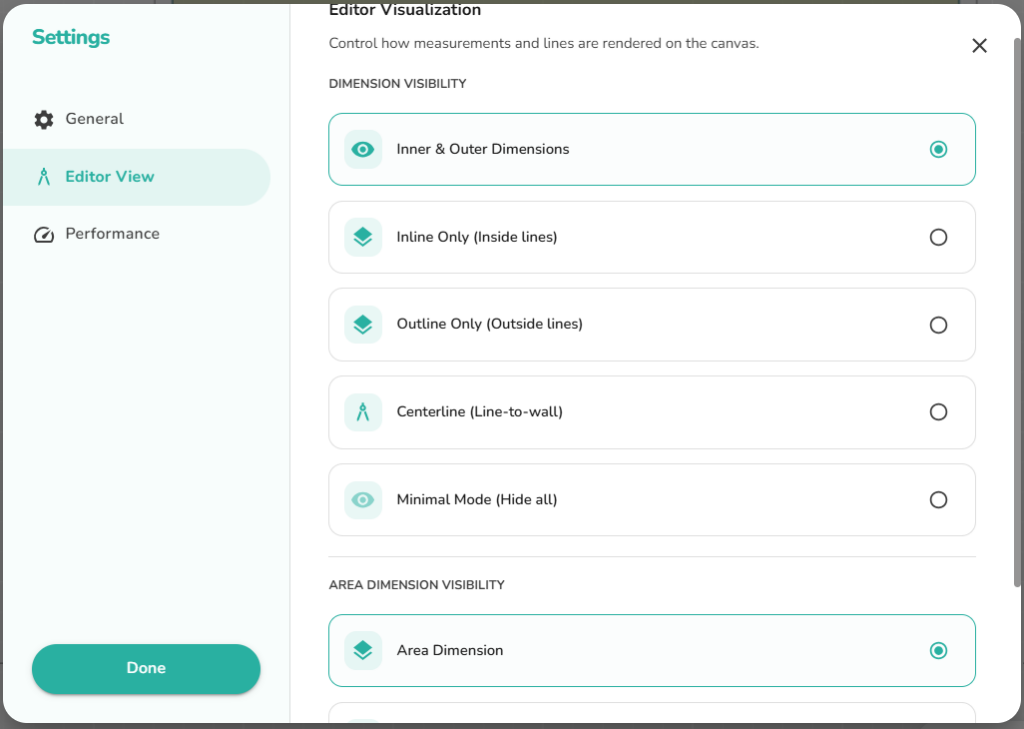
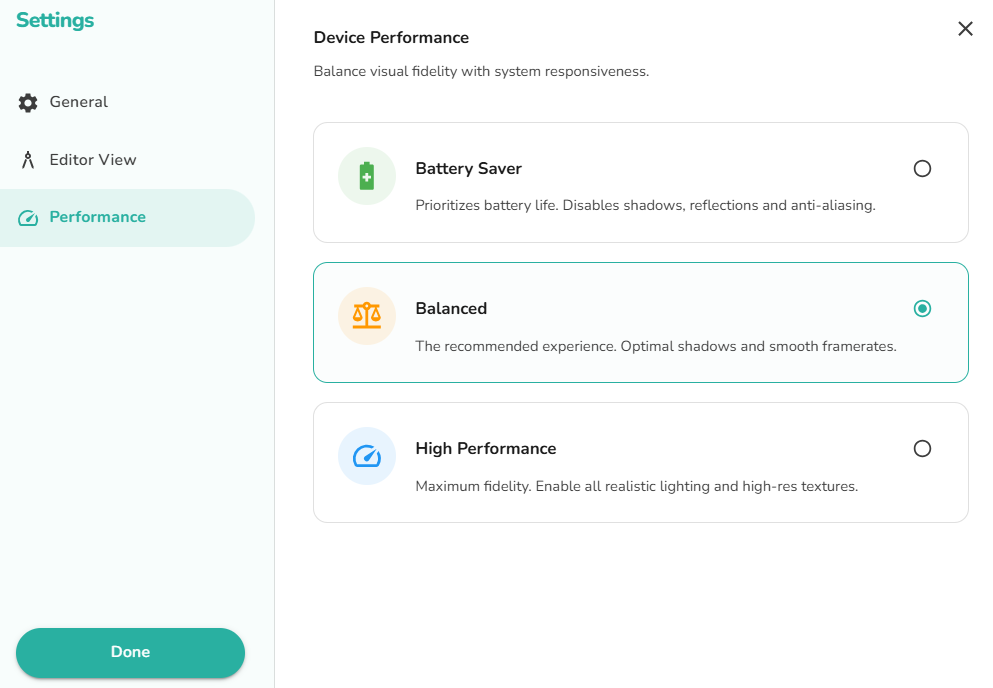
This button opens the Zlendo Realty Workspace global control center that allows you to manage your workspace settings. It has 3 tabs: General, Editor View and Performance.
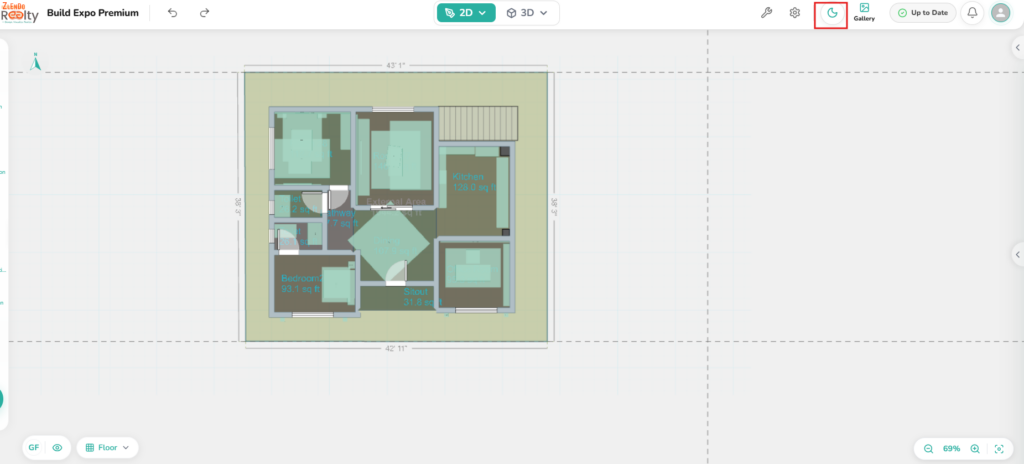
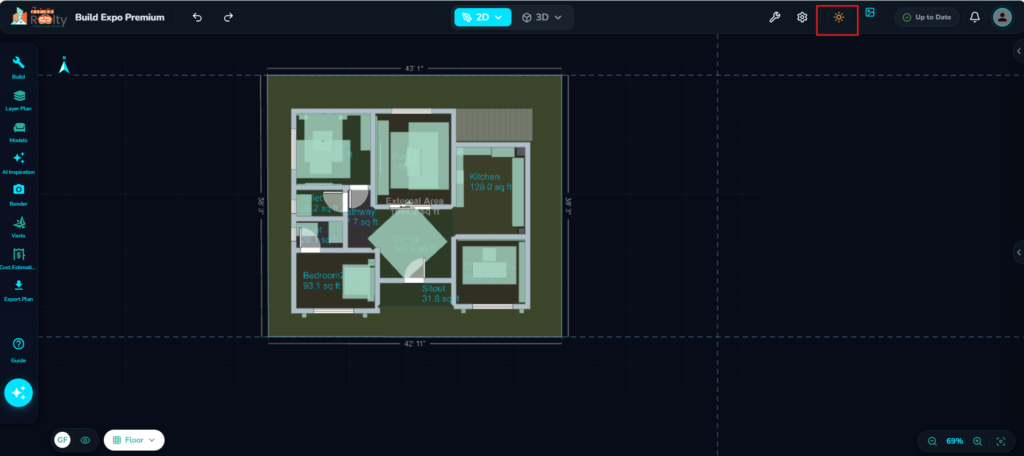
Light/dark display mode (Sun/moon icon):
Toggle the sun –>moon icon to shift from bright to dark viewing mode.
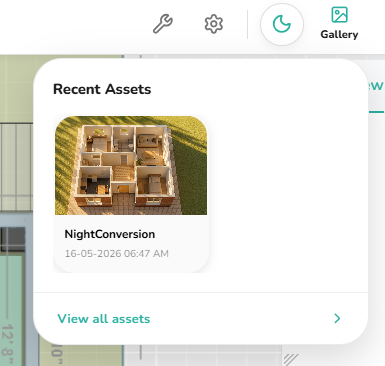
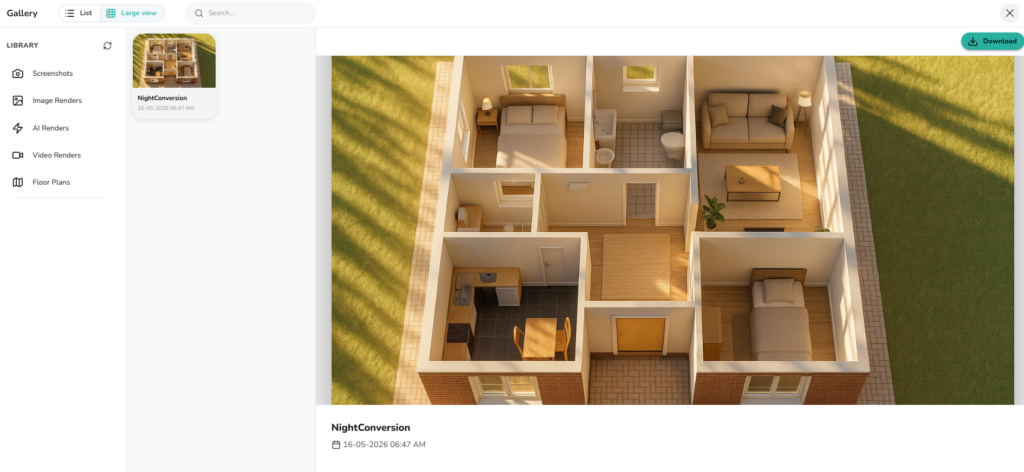
Gallery
Click to view your Rendered images and Item library.
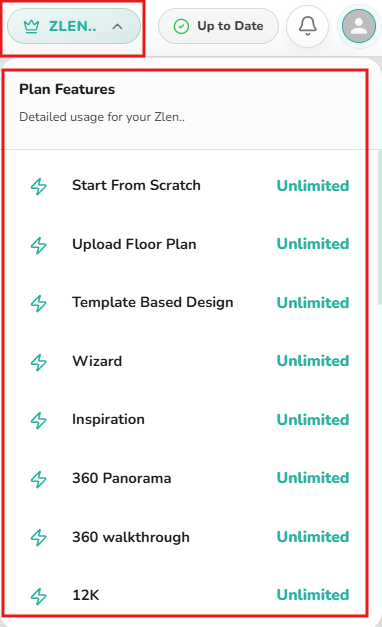
Plan Features
Click to view your plan features.
Save / Sync Status
When the work is saved the “Up to Date” indicator confirms that your progress is being securely synced to the cloud.
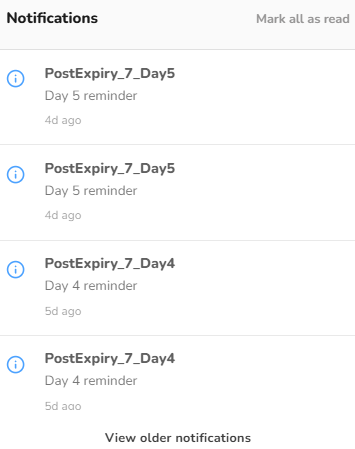
Notifications
Click on the bell icon to view all notifications.
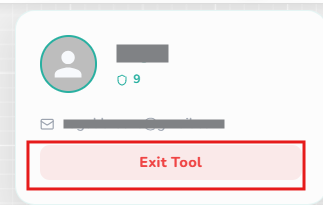
Profile (person icon/your account image)
Click to Exit Tool.

Workspace Left-Sidebar (Design Toolbox) #
The left side bar has all the design and build tools to create a functional floorplan. The new improved 2.0 version has a touch of genius added for better detailing and output.
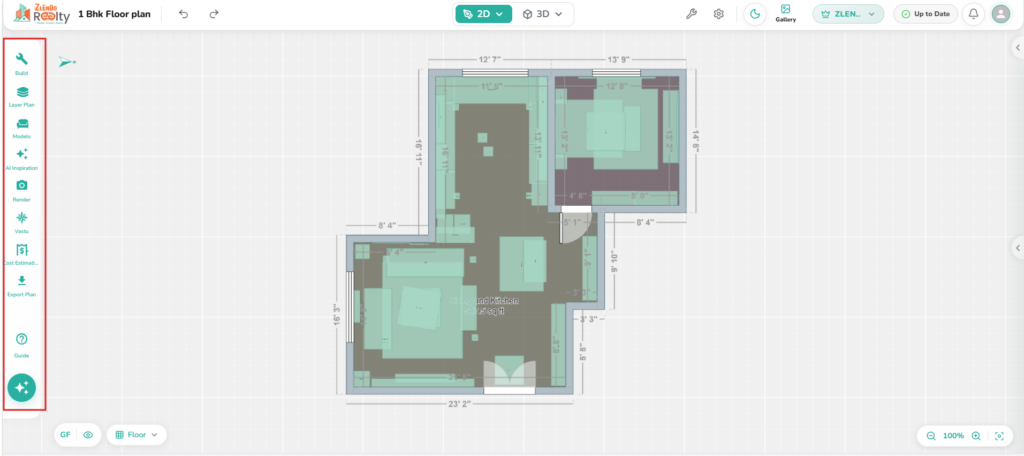
Design Tools #
Build Tool (structural elements) for your drawing board.
Layer Plan: Add / duplicate, and manage additional floors
Models (furniture/assets)
AI & Intelligence Tools #
AI Inspiration for room interior design concepts. Select a room for AI inspired interior design options.
Vastu report for checking spatial alignment and Vastu compliance of your floorplan.
Project Output Tools #
Render tool for high-quality visuals for client presentations or reports.
Cost Estimation tool for detailed project budgeting based on the location and materials chosen for your floorplan.
MEP tools provide access to Electrical, Plumbing, and Structural Diagram Editors for creating and managing building service layouts and structural plans.
Export Plan tool for generating final documentation
Support Tools #
Help Centre and quick access to drawing tutorials
Workspace Bottom: Status Bar #
The bottom static ribbon provides real-time data and settings details about your current drawing:
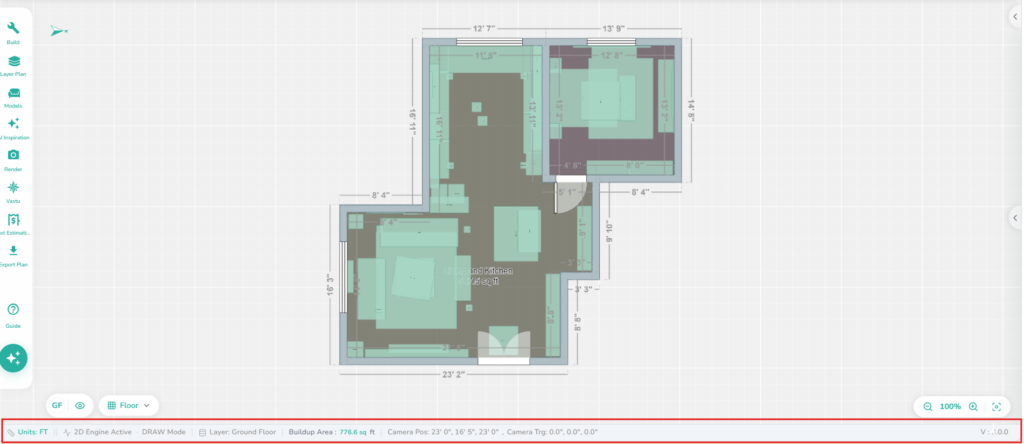
Workspace Current Status: Shows active units (e.g., Feet), rendering engine status, and current mode (e.g., DRAW Mode).
Project Metrics: Displays the active floor layer, current total buildup area, and exact camera coordinates (Position and Target), which are essential for precise navigation.
Version Info: Shows the current software version for reference.
Workspace Bottom-Corner View Buttons #
At the bottom-corners of the 2.0 Workspace, you have View control options.
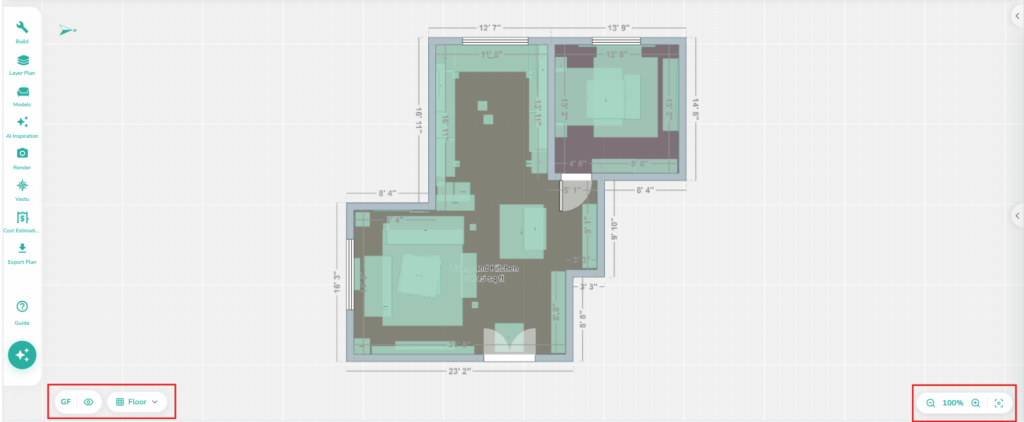
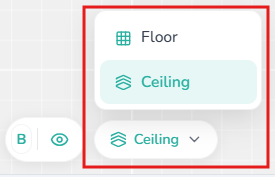
Floor Level & Floor/Ceiling Layer Toggle (Bottom-Left Corner)
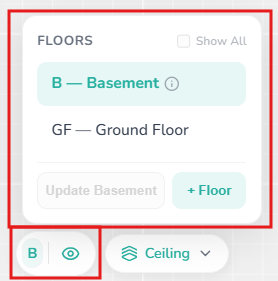
The Floor View Control Button (GF – Ground Floor, B – Basement, 1F – First Floor, 2F – Second Floor etc.) allows you to switch between different floor levels in your project or add a basement floor and additional floors.
– Click on the Floor abbreviation to open the floor selector. Select the floor you want to View from the list.
– Click on the Add Basement or Add Floor to duplicate the Ground Floor and create additional floors on top.
– Click on the Eye icon to quickly show/hide floor, ceiling, wall, furniture, dimensions and site area in the plan view.
The Floor/Ceiling Layer Button next to the Floor selector, allows you to shift from visible floor view to ceiling view (best viewed in 3D mode).
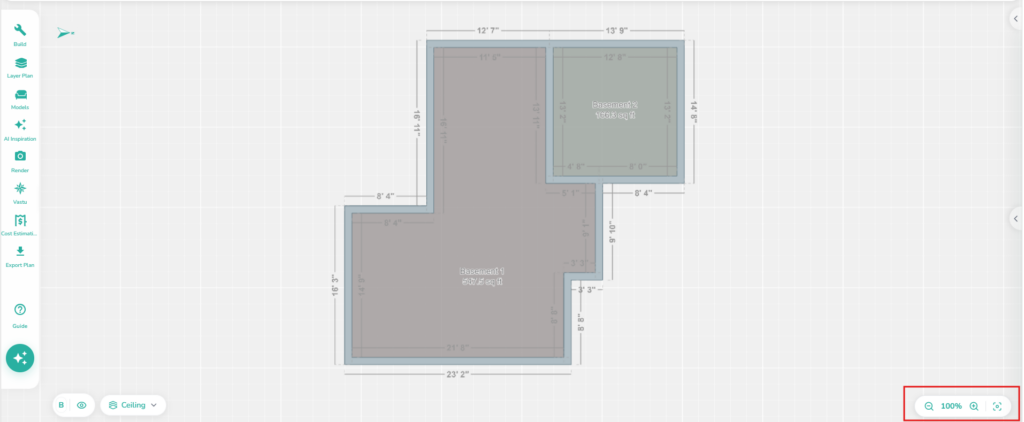
Zoom & Centre View Controls (Bottom Right Corner):
Use the Zoom controls (+/-) to enlarge/shrink view and “Center to Fit” toggle button to recenter your drawing.
Workspace Right-Side Panel #
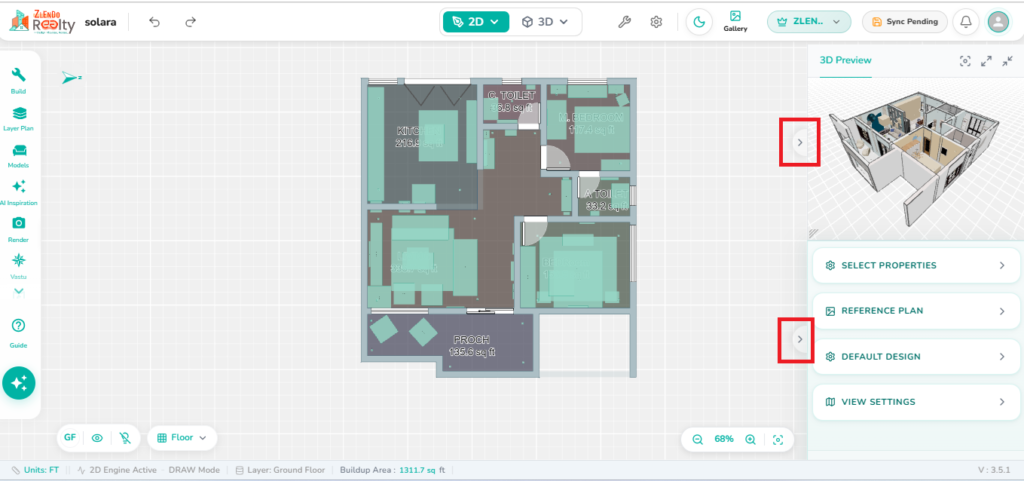
The Right-Side panel on the workspace has two collapsable sections.
The small arrows on the far right of the workspace indicate that these side panels can be collapsed or expanded to clear space, allowing you to prioritize the canvas based on your current task. Click to expand the side panels on the right.
2D/3D Preview Window #
Whichever mode you are working in the preview panel allows to view your plan in the other mode.
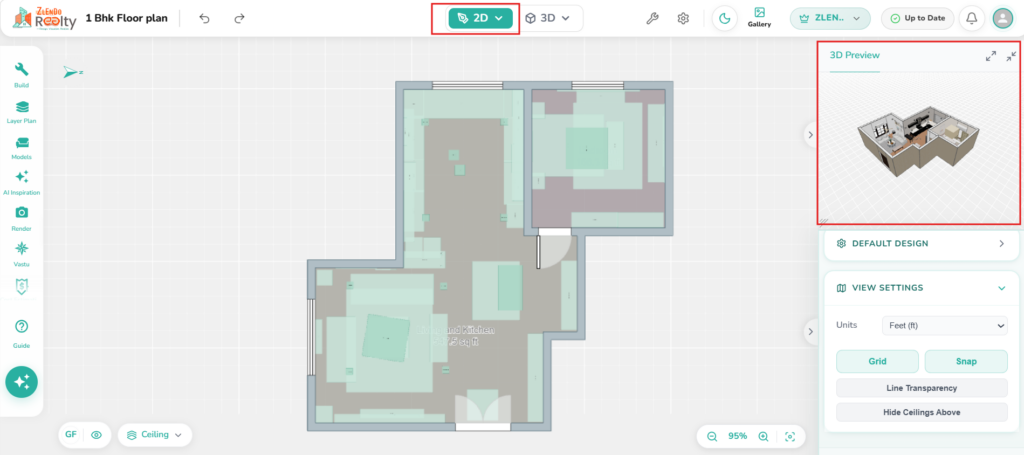
E.g., if you are in 2D drawing mode the right-hand preview will show you your plan in 3D view.
What it is: Think of this as your “live monitor.”
Why it’s useful: Even while you are busy drawing in 2D, this small window gives you an instant 3D look at your progress. You don’t have to keep switching modes back and forth to see how a wall or piece of furniture looks in 3D.
Workspace Design Controls #
This section is divided into three smart layers that react to what is currently selected in the drawing.
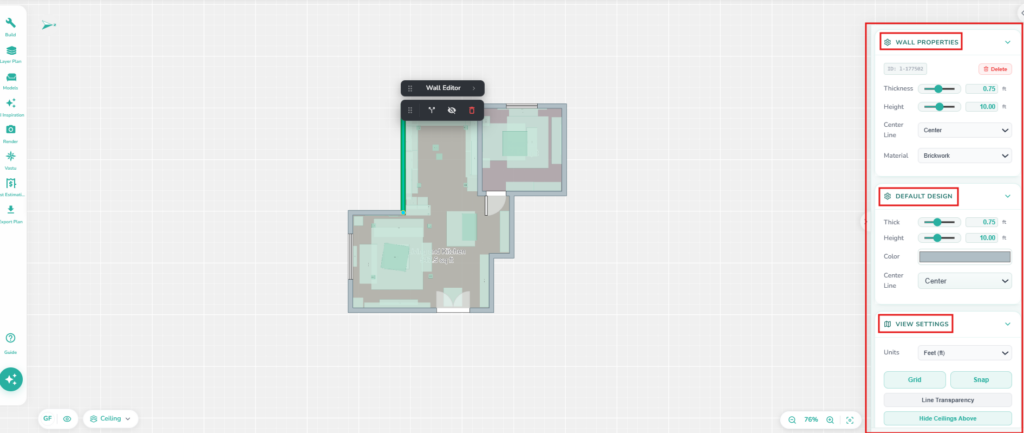
Asset Properties (Room / Wall / Hole (Doors or Windows) / Item) #
What it does: When you click on a wall / door/ window / item or furniture piece, this panel populates with its details like dimensions, position, offset properties.
Why it’s useful: This is where you go to change the specific characteristics of an object, such as the dimensions of a wall, including thickness, height and alignment (internal/center/external).
Default Design Settings #
What it does: This controls the “global” rules for new items you draw.
Why it’s useful: If you know all your walls need to be exactly 10 feet high and 0.75 feet thick, you set those defaults here. Everything you draw moving forward will automatically follow these specifications, saving you from manual adjustments later.
Reference Plan #
What it does: Allows you to import a reference image or PDF to use as a design guide.
Why it’s useful: Helps recreate or trace existing floor plans accurately by using the imported file as a visual reference during design.
View Settings #
What it does: This is for fine-tuning how you see your workspace.
Key Features:
Units: Switch between feet, inches, meters, etc.
Grid & Snap: Controls the “magnetic” feel of your drawing (helping things align perfectly).
Line Transparency: When you are in 3D, this automatically fades walls when your camera gets close, so you don’t get “blocked” by a wall while walking through a room.
Ceiling Control: A handy toggle to “hide ceilings” so you can look down into your 3D rooms without the roof getting in the way.


