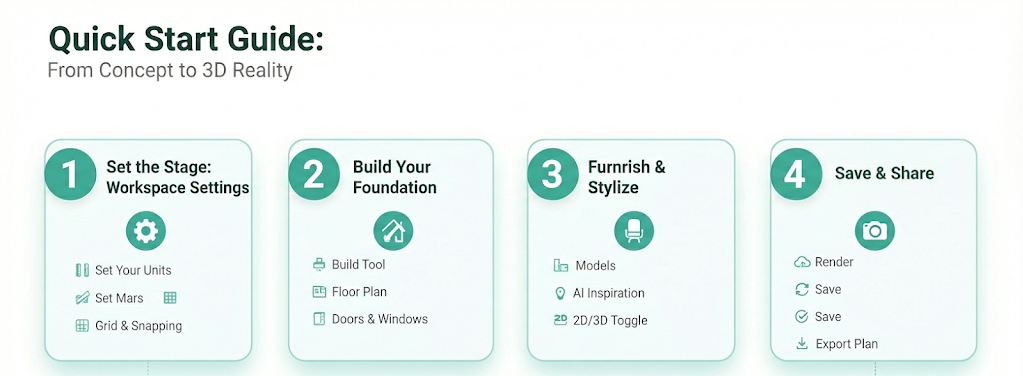
Welcome to your Zlendo Realty Workspace!
This is where your ideas take shape in a professional design environment. In the Editor workspace you can:
1. Draw your plan from scratch.
2. Edit an uploaded 2D Plan/a free Zlendo template/AI Wizard plan.
3. View and edit your plan in 3D Mode; View your plan in 360 Walkthrough and Panorama Mode.
4. Create screenshots, Image and Video renders and create your own design templates.
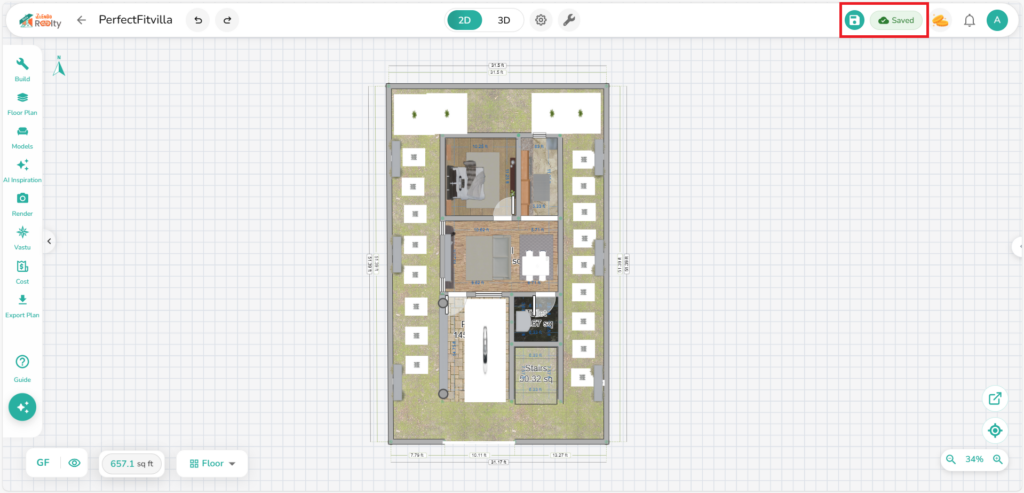
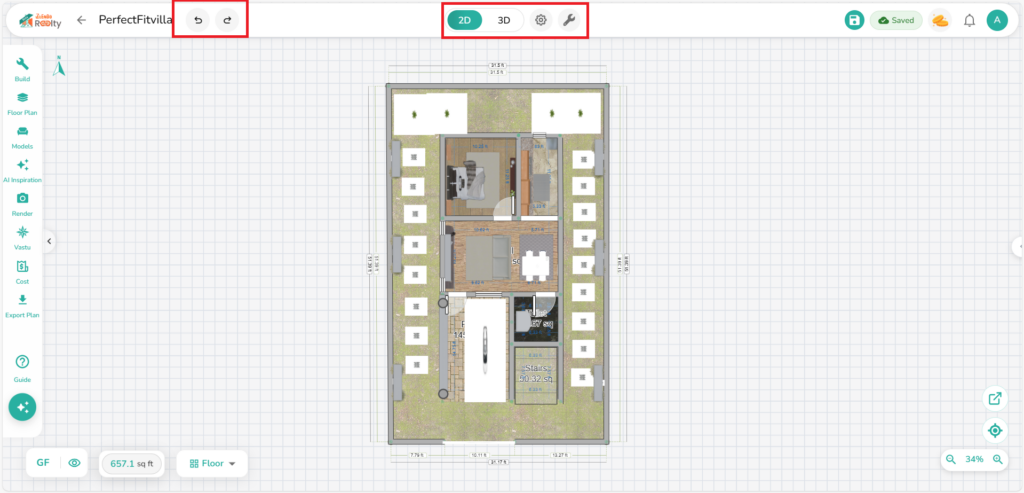
The Zlendo Realty Workspace has:
Top Ribbon with the Main Control panel: 2D/3D buttons, Settings and Save.
Tool Sidebar on the right, with Plan Building Tools
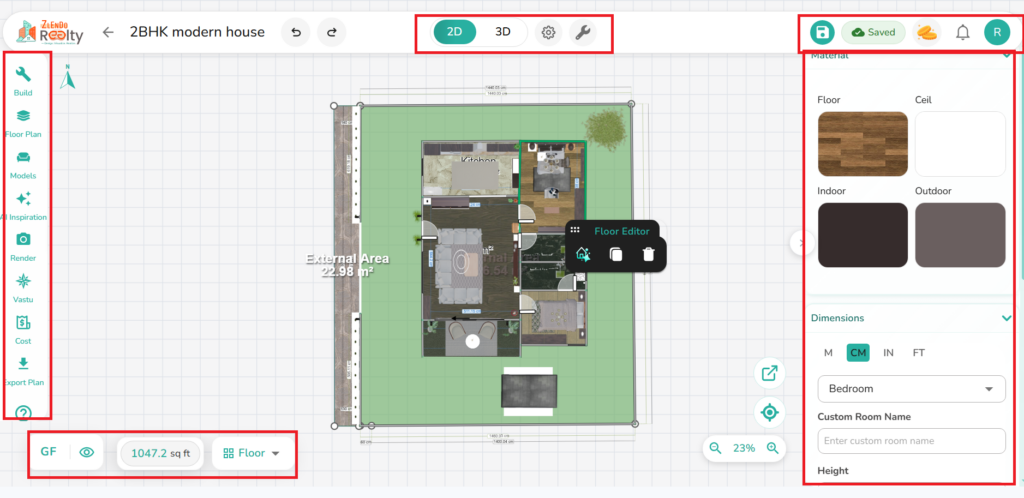
Editor Box on the right to manage Materials, Dimensions, and Room Labels
Other Controls at the bottom of the Workspace: Floor Viewer, Plan Area and View controls: Zoom and Centering.
How to Use the Workspace #
Using your Zlendo Realty Workspace Tools to bring your plans to life is easy.
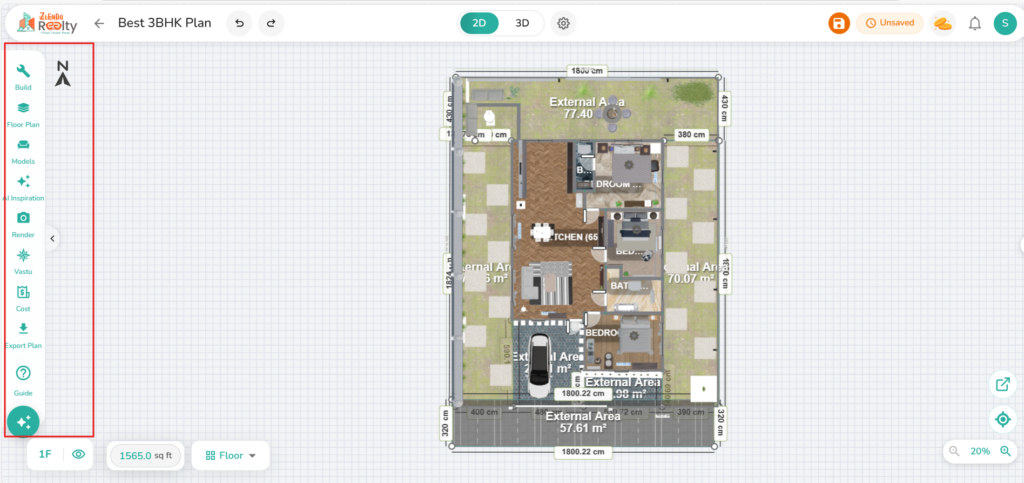
🛠️ Introducing the Construction Tool Sidebar #
Zlendo Realty has 8 powerful Tools to help bring your project to life.
Build: The primary tool for adding structural elements like walls, windows, and doors.
Floor Plan: Refine your layout and set specific dimensions for your rooms.
Models: Open a massive library of furniture and decor to drag-and-drop into your design.
AI Inspiration: Instantly generate new color palettes and style ideas using artificial intelligence.
Render: Capture high-quality, photorealistic images and videos of your space to see the final result.
Vastu: Ensure your design aligns with traditional architectural principles for energy and balance.
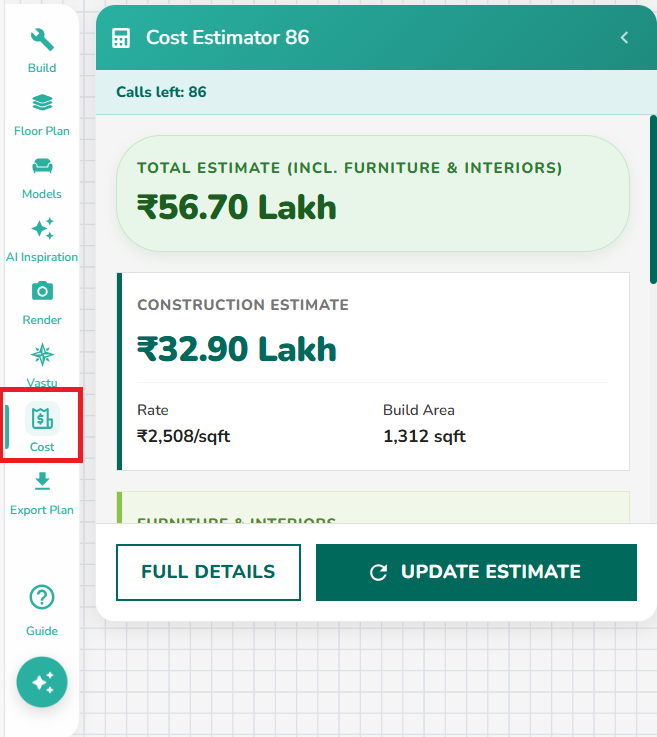
Cost: Get a real-time estimate of the materials and items used in your project.
Export Plan: Download your floor plan layouts as high-resolution files for sharing.
Guide: Access Navigation quick tips and Help docs if you get stuck during the design process.
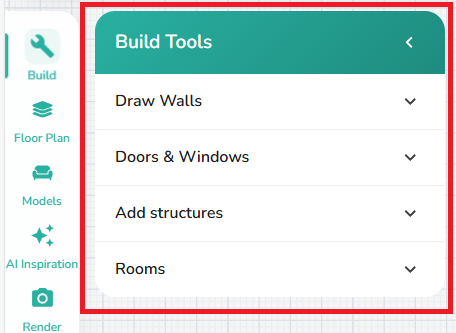
🛠️ Build Tools #
Click on the Build Tool icon to draw walls, rooms, and add architectural elements like doors and windows to your plan.
The Build Tools are displayed as icons under categories: Walls, Doors & Windows, Structures and Rooms.
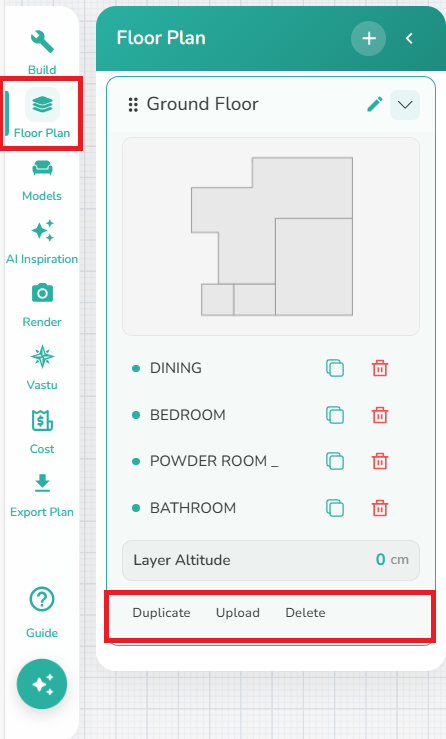
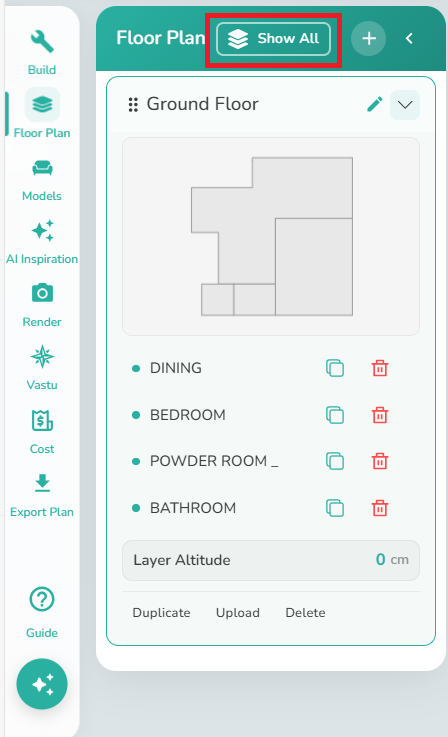
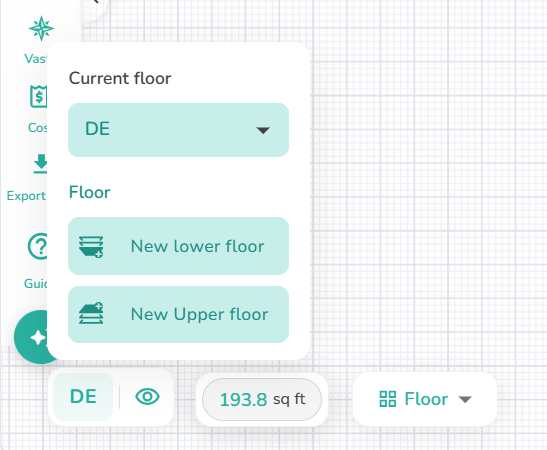
🛠️ Floor Plan #
Use this tool to add/duplicate, upload a floor plan or delete a floor and manage your floor plans.
🛠️ 3D Floor Plan #
In 3D Mode you can view all your floors separately and in multi-levels.
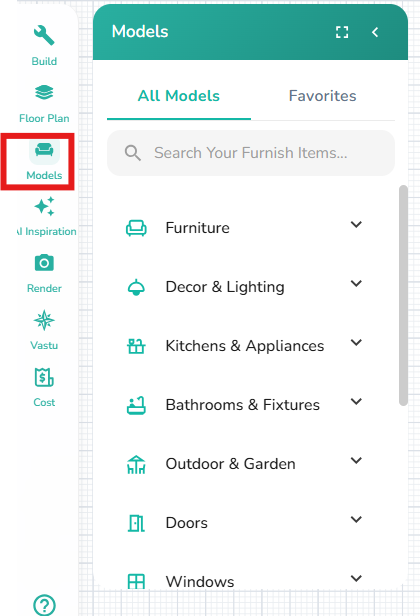
🛠️ Furniture & Decor Models #
Browse and place furniture and decor into your plan from our extensive library.
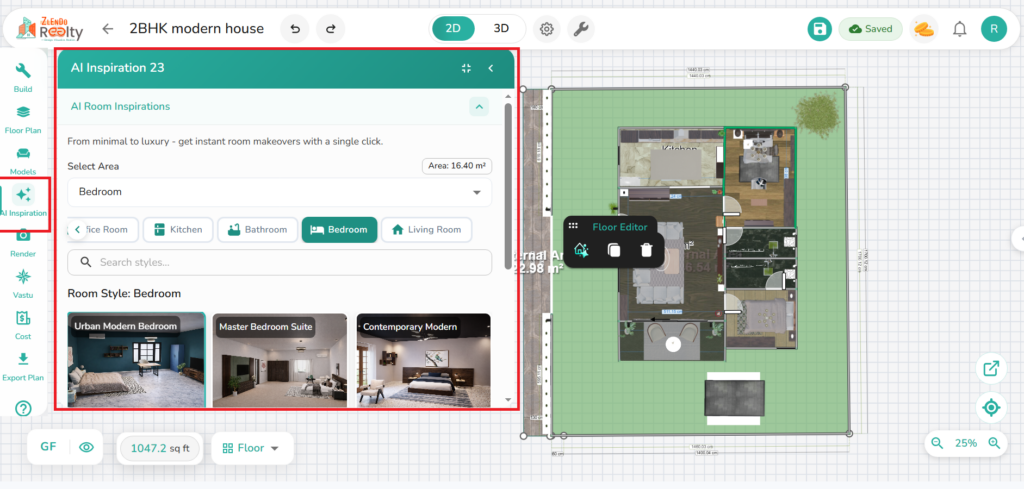
🛠️ AI Inspiration #
Get AI-powered interior design suggestions for your rooms.
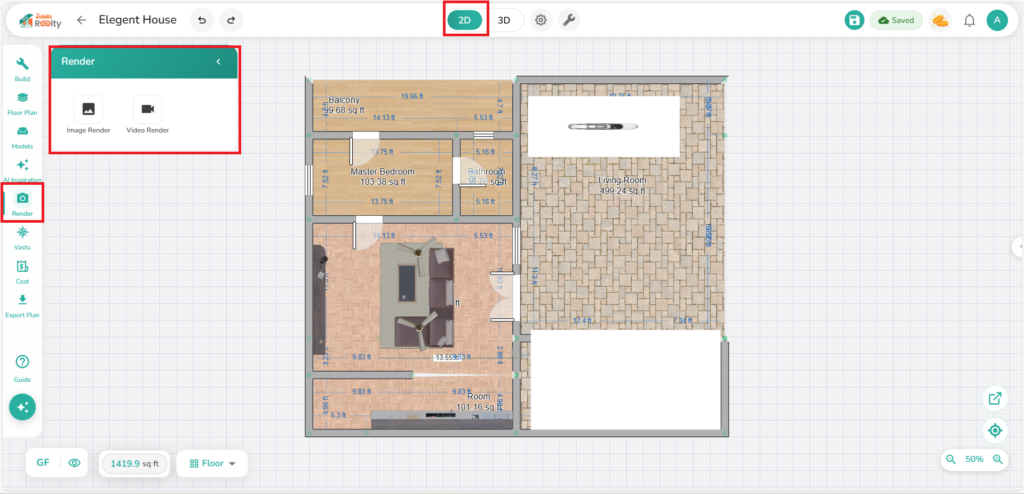
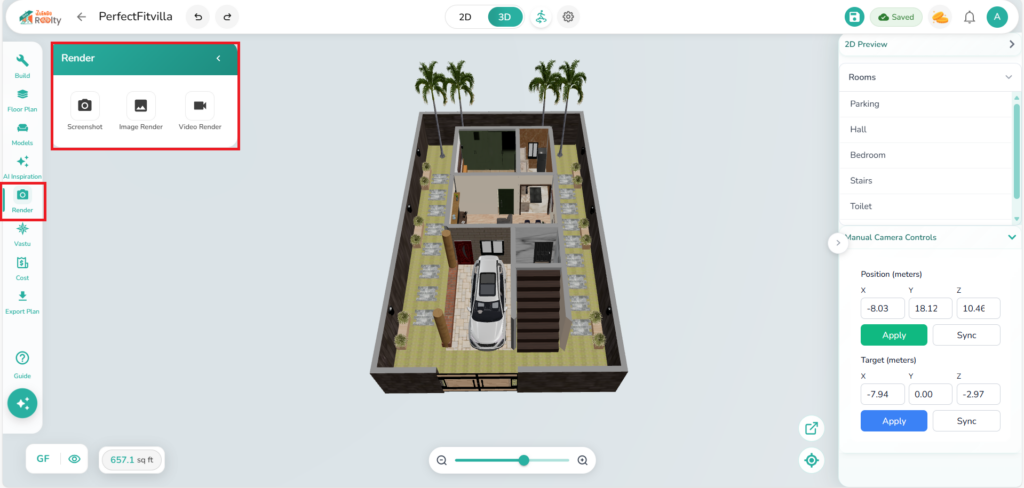
🛠️ Render Tool #
In 2D/3D mode you can take screenshots and create high-quality realistic images and 3D video renders of your design.
2D Render #
3D Render #
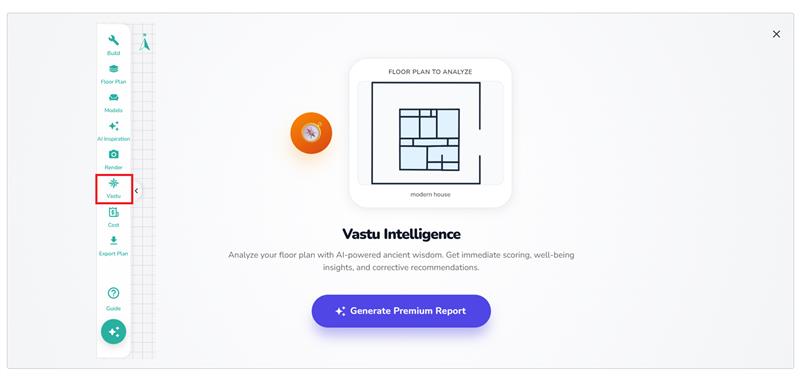
🛠️ Vastu Tool #
To check if your house plan is Vastu compliant, click on the Vastu Icon.
Just one click to generate a Vastu compliance and analysis report for your floor plan.
🛠️ Cost Estimation #
Get real-time cost estimates for your project.
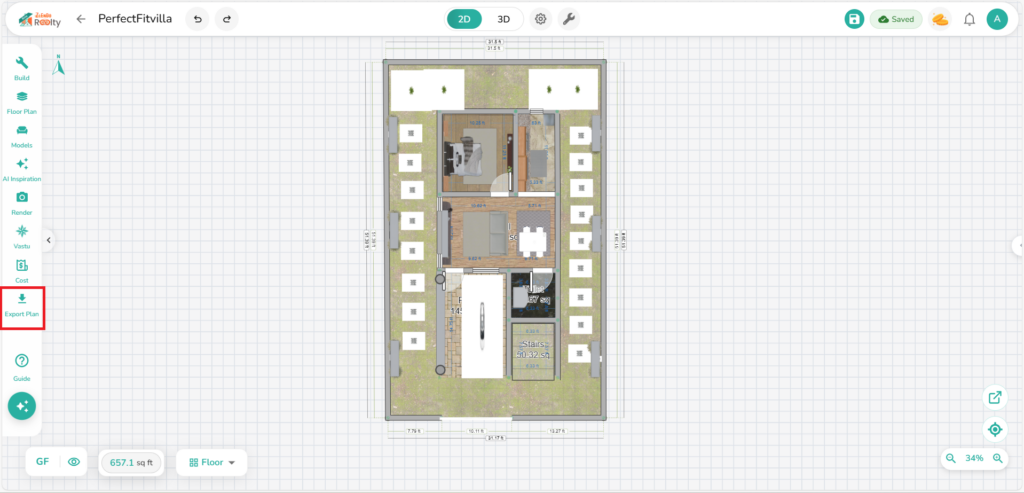
Export Plan #
Click on the Export Icon to Open the Floor Plan Generator.
You can save your plan to the Gallery/Download your Plan.
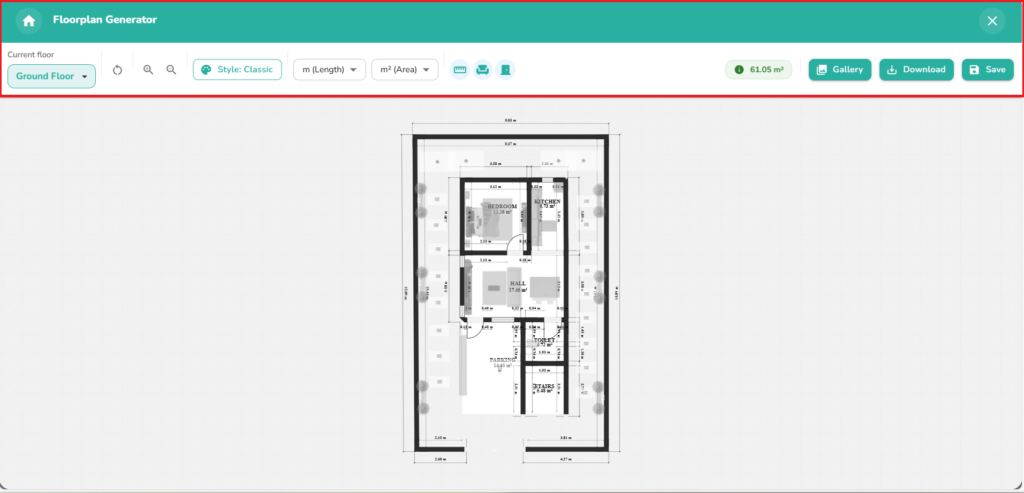
Floor Plan Generator #
The Export Plan Floorplan Generator‘s top ribbon has Reset button, Zoom in/out, Style, Units, hide objects options, Gallery, Download and Save buttons.
Read More about the Floorplan Generator here.
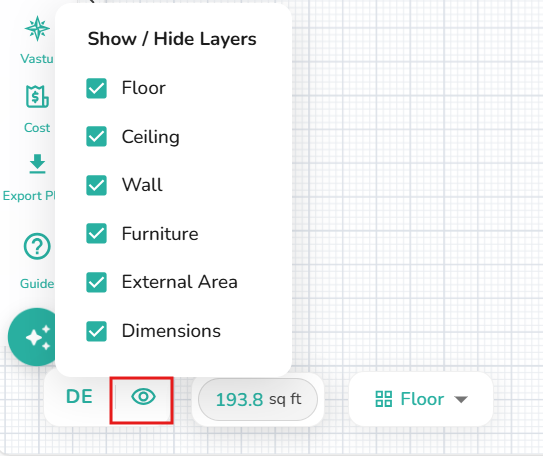
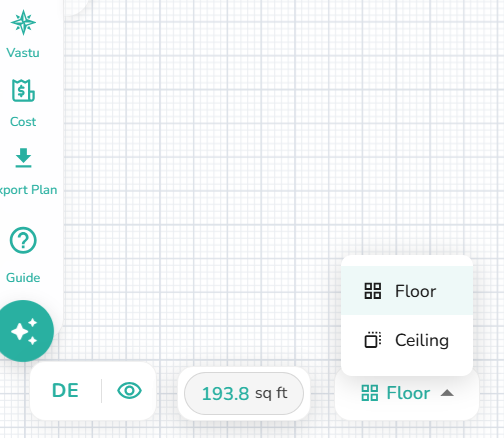
View & Precision Controls #
Use the View and Precision Controls to adjust dimensions, materials, name/rename Rooms and Floors.
Zoom & Pan: Use the bottom-right tools to get a bird’s-eye view or zoom in for fine-tuning.
2D/3D Toggle: Switch between a technical top-down blueprint and a fully immersive 3D walkthrough.
Measurement Display: Keep an eye on your total square footage at the bottom left to stay within your limits.
Floor Selector: Easily move between different levels of your building.
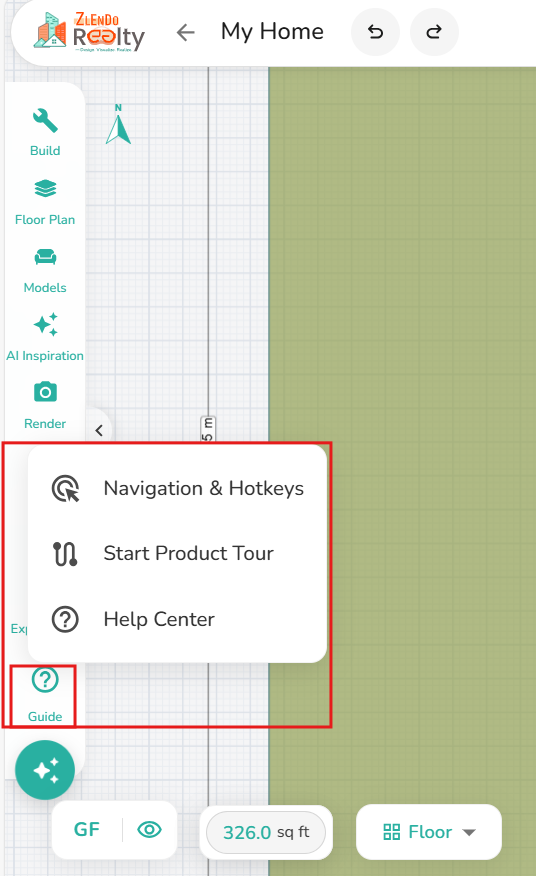
Workspace Guide #
The Guide tool has the Navigation guide, a quick How-to Video tour, and Help Center link for first-time users.
2D/3D Toggle Buttons #
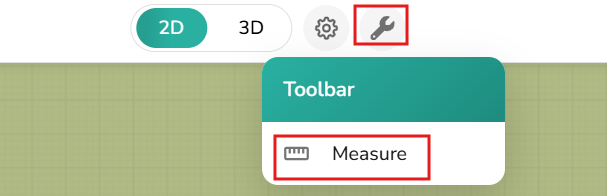
On the Top of the Workspace is a ribbon with the undo/redo option, Modes: 2D View, 3D View, Workspace Settings, Measure tool, and Save buttons.
Floor Display #
On the bottom-left corner of the workspace you will find the Floor details.
Project Management Tools #
Manage your design project easily by adjusting the workspace look and dimension units in advance.
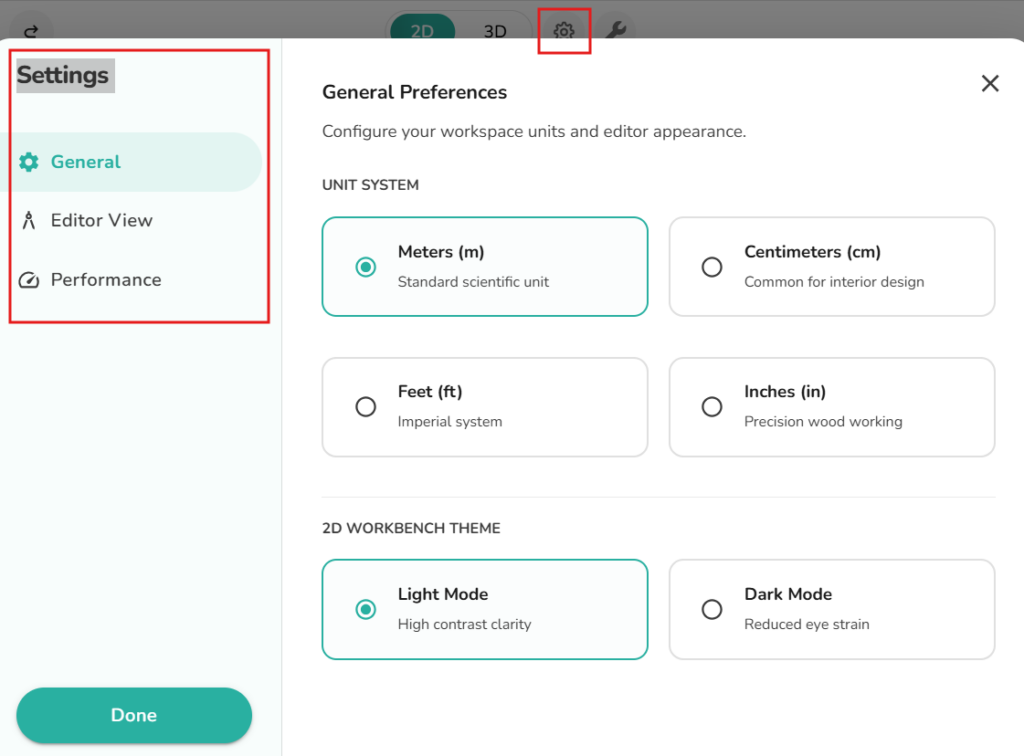
Workspace Settings: Located at the top center next to the view toggles, this tool allows you to customize your design environment.
Measure Tool: Click on the Measure Tool to measure a wall.
Save Status: Found in the top right, this ensures your hard work is backed up to the cloud instantly.
Project Workspace Settings #
From Workspace settings on the top, General, Editor and Performance Settings.
Customization: Adjust your workspace preferences, such as grid visibility and snapping options, to match your workflow.
Units & Precision: Toggle between different measurement units or adjust how dimensions are displayed on your plan.
Editor Preferences: Fine-tune the technical behavior of the design interface for a smoother experience.
Saving & Autosave #
The Workspace automatically saves your work at regular intervals to prevent data loss. You can also manually save your project at any time.
To save a plan at any stage, click on the Save button on the top ribbon.